“Aye, Eye – The Eyes – Part 2!”

Greetings faithful anatomy students! Today we continue our studies of the complex and elegant eye in Anatomy Lesson #30, The Eyes – Part 2. Anatomy Lesson #29 covered anatomy and function of eyelids, eyebrows and eyelashes. Today, we will discuss other structures that are designed to aid the eye in the vision it provides: bony orbit, orbital fat (yes indeed!), conjunctiva, lacrimal apparatus, and extraocular muscles.

And just to set the mood, eyes are extremely important in the English language. A quick glance (ha ha) yields more than 200 eye idioms: catch one’s eye, apple of one’s eye, in the blink of an eye, more than meets the eye, in a pig’s eye, all eyes and ears, a bird’s eye view, a sight for sore eyes, easy on the eyes, bedroom eyes (we know who has THOSE! ?), can’t take eyes off of, eye for an eye, catch one’s eye. Well, you get the idea…references to the eye makes English more colorful! Blink. Blink. Wink. Wink.

SPOILER ALERT: early in this lesson a wee spoiler appears from Diana’s eighth book of the Outlander series: no names, no dates, and no places. A warning will surface beforehand. Look for this (heehee…this is going to be fun!) obnoxious, glaring, flashing sign so you can skip and not whinge about something you would rather not read. Don’t say I didn’t warn ye!

warning

Let’s begin this lesson by considering the bony home for the eye. Each eyeball dwells in a cave known as the bony orbit (Photo A – dashed black line). Each orbit is composed of skull bones, some of which are so thin they readily transmit light (Photo A – black arrow). It isn’t even Halloween yet – Boo! ?

Bony-orbit-KLS-edited

Photo A

A whopping seven skull bones form each bony orbit. These are difficult to distinguish in the adult skull where the bones are fused, but easily discerned using a color coded image (Photo B – right bony orbit):

Blue = fontal bone

Orange = zygomatic bone

Green = maxillary bone

Violet = lacrimal bone

Grey = ethmoid bone

Pink = palatine bone

Gold = sphenoid bone

The bony orbits protect and support the eyeballs and provide attachment for several accessory structures. Although difficult to appreciate in a two-dimensional figure, each orbit is shaped like a cone: the apex (point) lies at the back and the base, or orbital rim, faces front (Photo B – dashed black line). Each apex has holes which serve as access ports for nerves and blood vessels to enter and leave the bony orbit (Photo B – red stars). The orbital rim, roof and temporal (side) walls are thick and strong but the nasal (medial) wall and part of the floor are thin and delicate (Photo B – black arrows). In fact, each medial wall is so thin it is known as the lamina papyracea (Latin meaning paper layer)!
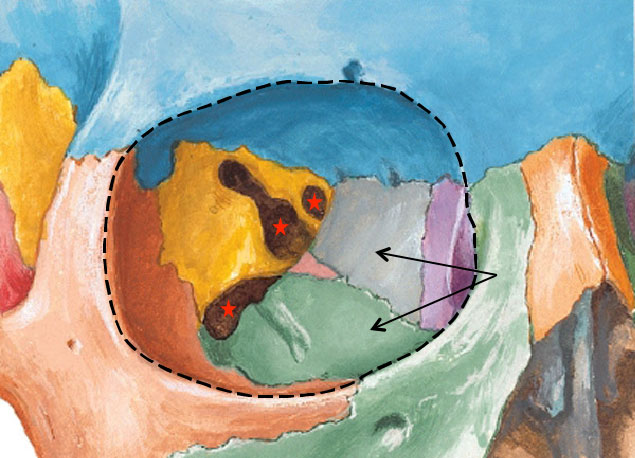
Figure0002B-KLS-edited

Photo B

Indeed, a direct blow to the bony rim can break any of walls but the medial wall and floor are most commonly disrupted. Known as a “blowout” fracture, this injury appears in one of Diana’s prolific writings!

SORTA SPOILER ALERT: The following quote describes this type of injury. If you don’t want to read it skip the next two quotes and images and head straight for the furry mammal with the big eyes. NO! Not Rupert! It has orange eyes and Rupert doesn’t.

warning

Herself correctly describes the consequences of a blowout fracture suffered by a character in her 8th book, Written in My Own Heart’s Blood, a.k.a. Moby. Claire relates:

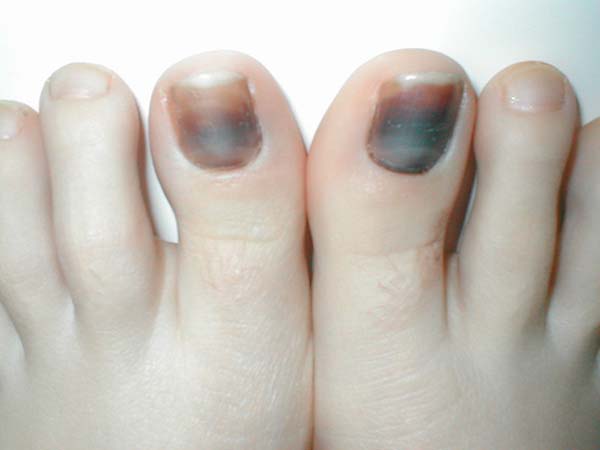
A split lip and badly swollen eye seemed to be the chief injuries… The eye was swollen half shut …the underlying flesh a lurid palette of green, purple, and ghastly yellow. The eye itself was red as a flannel petticoat … I couldn’t move the globe of the eyeball upward at all…

Clinical Correlation #1: Photo C shows the appearance of a right eye (on your left) with a classic blowout fracture juxtaposed with a normal left eye. The left eye has a white sclera, normal skin of eyelids and cheek and, when tested, the patient can elevate (lift) the normal eye. The right eye is patently abnormal: the sclera is red due to hemorrhage and the eyelids and cheek are bruised and swollen also due to hemorrhage. The right eyeball cannot be raised in tandem with the left eye; it is frozen with the gaze directed forward. Failure to elevate the right eye occurs because a small muscle of the eyeball (inferior rectus – see below) is trapped within the fracture, anchoring the globe and preventing its lift.
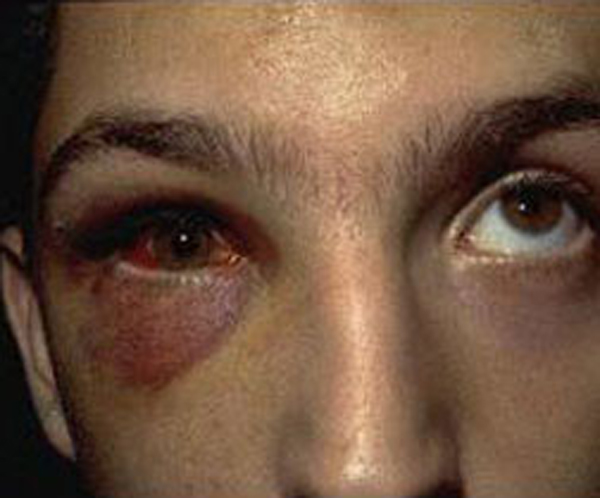
_136_blowout1 KLS edited

Photo C:

And, continuing the quote from Moby – again, Dr. Sassynach is our observer:

It was almost certainly what was called a “blowout” fracture, which had cracked the delicate bone of the orbital floor and forced a displaced bit of it—along with part of the inferior rectus muscle—down into the maxillary sinus. The edge of the muscle was caught in the crack, thus immobilizing the eyeball.”

YOU CAN LOOK NOW!

lemur-rupert

See, I told ye it wasna Rupert!

Photo D is a vertical CT scan through the skull. The paired ghoulish-looking white rings are the bony orbits. The patient’s left orbit (on your right) is normal; the black triangular space below it is the normal left maxillary sinus. These are separated by a thin white line, the orbital floor (Photo D – green arrow). The patient’s right eye shows a blowout fracture. The red arrow points to the white, broken and dangling bony bit of the orbital floor. The right maxillary sinus is grey because it is filled with displaced orbital tissues: the light grey material is prolapsed orbital fat (see below) and the aforementioned inferior rectus muscle (Photo D – blue arrow) which is trapped in the fracture anchoring the eyeball so it cannot be elevated. Very interesting stuff!
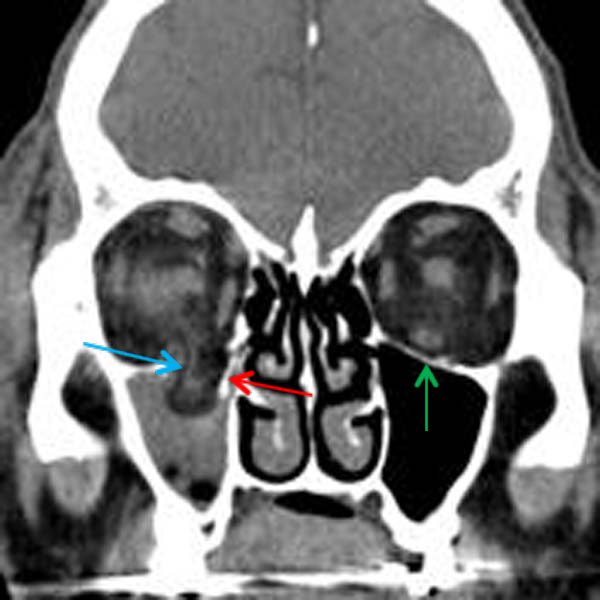
Blowout-fracture-KLS-edited

Photo D

Now, structures other than eyeballs inhabit the bony orbits, including extraocular muscles, blood vessels, nerves and orbital fat. However, the eyeballs do not touch the bones of the orbit. Rather, they rest-in-a-nest of orbital fat that fills all the nooks and crannies not otherwise occupied. Orbital fat acts like a shock absorber cushioning the eyeball against trauma; it also serves as a socket in which each orb glides, slides and rotates. Photo E shows a horizontal section through the right eyeball and bony orbit; the cone shape of the bony orbit is easily appreciated from this birds-eye view (Photo E – black dashed lines). For orientation, the cornea and superior tarsus are labelled (Anatomy Lesson #29). See the yellow globs of “stuff” surrounding the eyeball? This is orbital fat and it is surprisingly abundant! Periorbital fat is also present but it lies superficial to the bony orbit being confined to eyelid margins and overlying orbital rim and cheek bone/zygomatic arch  (Anatomy Lesson #8).

Try this: Close one eye and gently tap the soft tissues around the eyelids and overlying the orbital rim and zygomatic arch. Feel the springy and spongy nature of the soft tissues? This is periorbital fat. Orbital fat lies deep in the bony orbit and cannot be readily palpated.
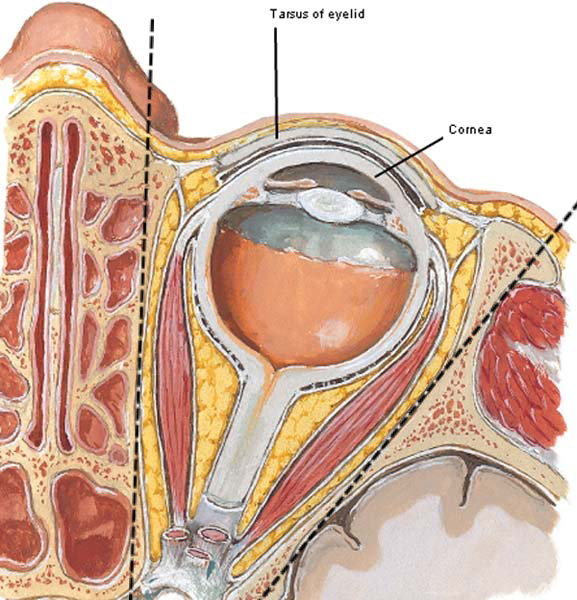
Figure0079A-orbital-fat-KLS-edited

Photo E

Most of the exposed eye is covered with the conjunctiva, a transparent, vascular mucous membrane. Bulbar conjunctiva overlies the sclera (white part) of the eyeball but it stops at the corneal rim and hence, does not cover the cornea. Palpebral conjunctiva lines upper and lower eyelids (Photo F).
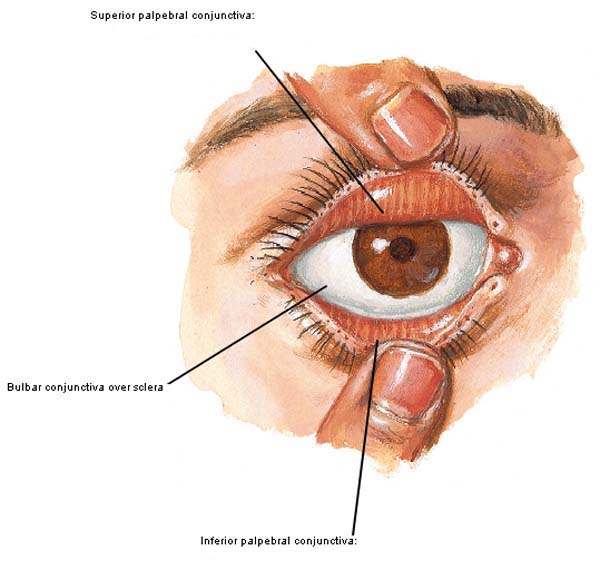
Figure0077A conjunctiva KLS edited

Photo F

This design is possible because the conjunctiva reflects (turns) from the sclera onto the insides of upper and lower eyelids (Anatomy Lesson #29). This reflection creates a blind pocket or fornix where the sheet of conjunctiva turns from one surface onto another (Photo G – vertical section through eyeball and lids of eye). Thus, objects trapped on the exposed surface of the eyeball (e.g. contact lens) cannot move into the deep recesses of the bony orbit unless the conjunctival fornix is torn. The conjunctiva secretes mucus and contributes to the tear film (see below); it also produces immune cells that help protect the eyeball from microbes.
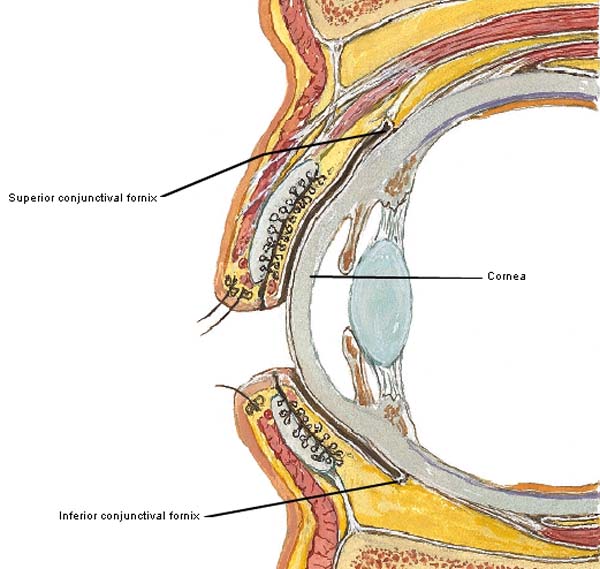
Figure0077B conjunctival fornices KLS edited

Photo G

Now, it is time to consider the lacrimal apparatus (Latin meaning tears), an uppity name for the system which produces and drains tears. The lacrimal apparatus for each eye includes a lacrimal gland, lacrimal canaliculi, lacrimal sac and nasolacrimal duct.

The lacrimal gland is roughly the size and shape of a large almond. Most of it lies inside the bony orbit but a smallish part sits in the outer upper eyelid (Photo H). The purpose of the gland is to secrete (discharge) the aqueous part of the tear film. Several small ducts (tubes) pierce the conjunctiva and empty the secretion onto the surface of the eyeball.
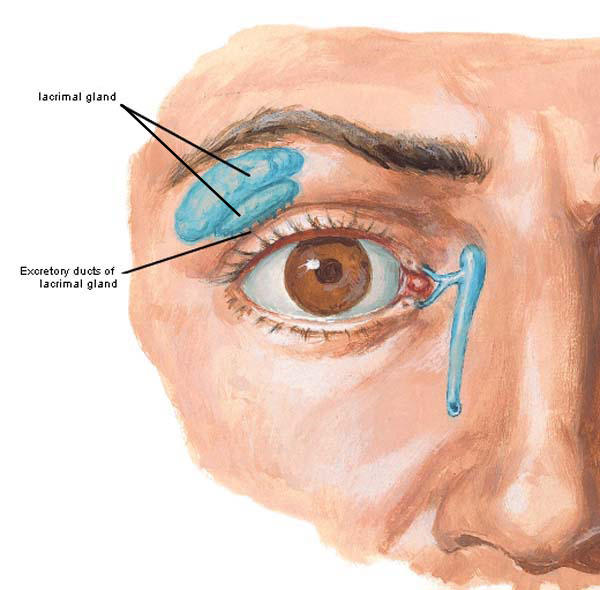
Figure0078A-lacrimal-apparatus-KLS-edited

Photo H

As the palpebral parts of orbicularis oculi (Anatomy Lesson #29) close the eyelids, the tear film sweeps across the exposed surface of the eyeball. To understand where it goes next, please see Photo I. Near the nasal ends of upper and lower eyelids, the eyelashes (Anatomy Lesson #29) disappear and small elevations appear on the lids; these are superior and inferior lacrimal papillae (pl.). Each papilla bears a small opening, the lacrimal punctum.

Try this: Face a mirror and gently pull down on the lower eyelid. See the small bump near the medial canthus (Anatomy Lesson #29)? This is the inferior lacrimal papilla. Find its tiny opening, the inferior lacrimal punctum. Repeat with the upper lid.
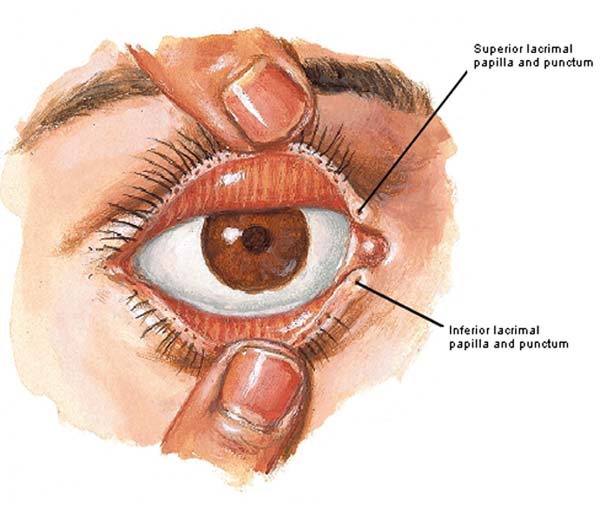
Figure0077A lacrimal papillae and punctum KLS edited

Photo I

As the eyelids close, the tear film is swept toward the lacrimal puncta (pl.). Tears then enter the puncta and drain through the next group of lacrimal structures: lacrimal canaliculi (pl.), lacrimal sac and nasolacrimal duct. The paired lacrimal canaliculi are tiny ducts, each leading from its respective punctum to the lacrimal sac, an enlargement at the side of each nasal cavity. Tears then drain into the longer nasolacrimal duct.
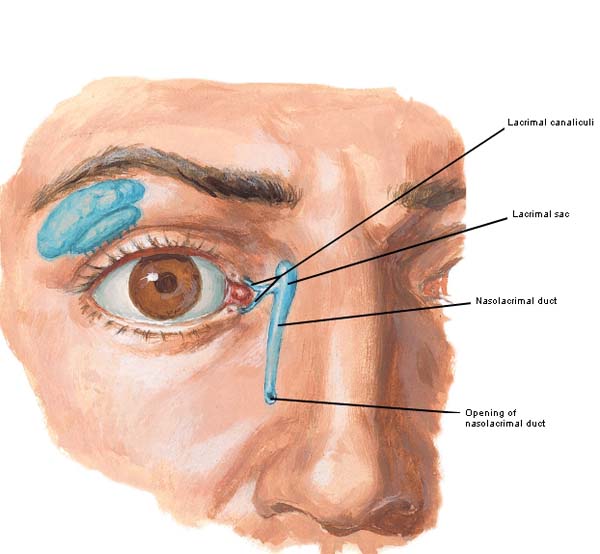
Figure0078A lacrimal sac and duct KLS edited

Photo J

The nasolacrimal duct opens into the outer wall of each nasal cavity (Photo K – outer wall of right nasal cavity) under shelter of the inferior concha (Anatomy Lesson #28). After collecting in the nose, we blow out or swallow our tear film.

Hard to believe, but the thin tear film (40 µm or .0016 in) has three layers: 1) a deep mucous layer made by specialized conjunctival cells; 2) a middle aqueous film produced by the lacrimal glands; 3) an outermost lipid sheet released by tarsal glands (Anatomy Lesson #29).

Excessive tearing caused by pain or intense emotion, floods the lacrimal system, spills over the cheeks and fills the nasal cavity; this is why our nose “runs” when we weep.
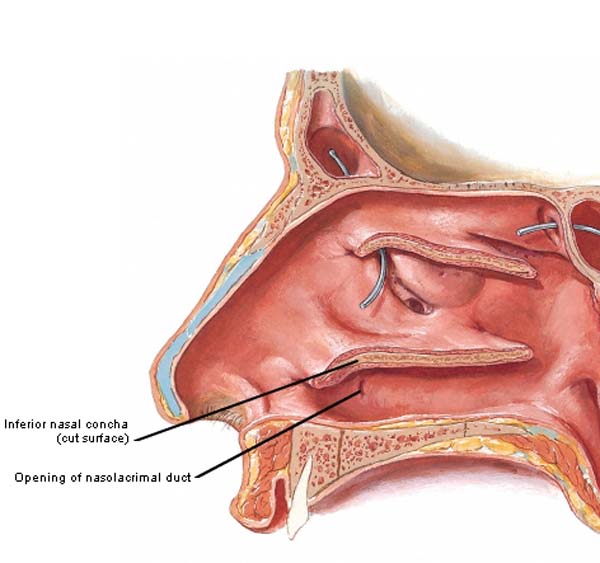
Figure0033C nasolacrimal duct KLS edited

Photo K

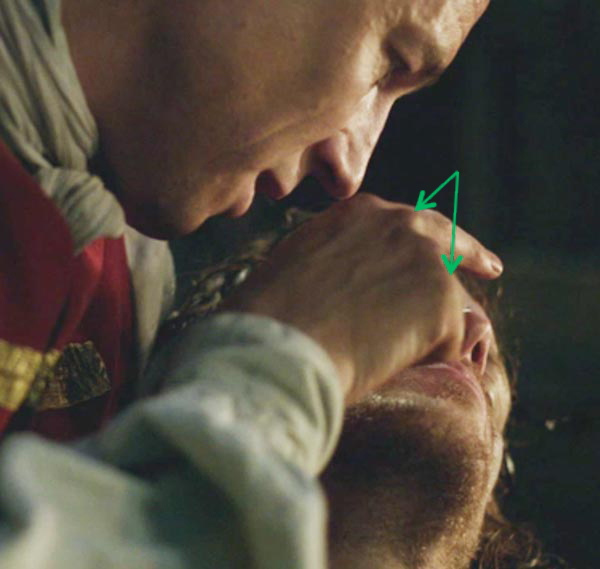
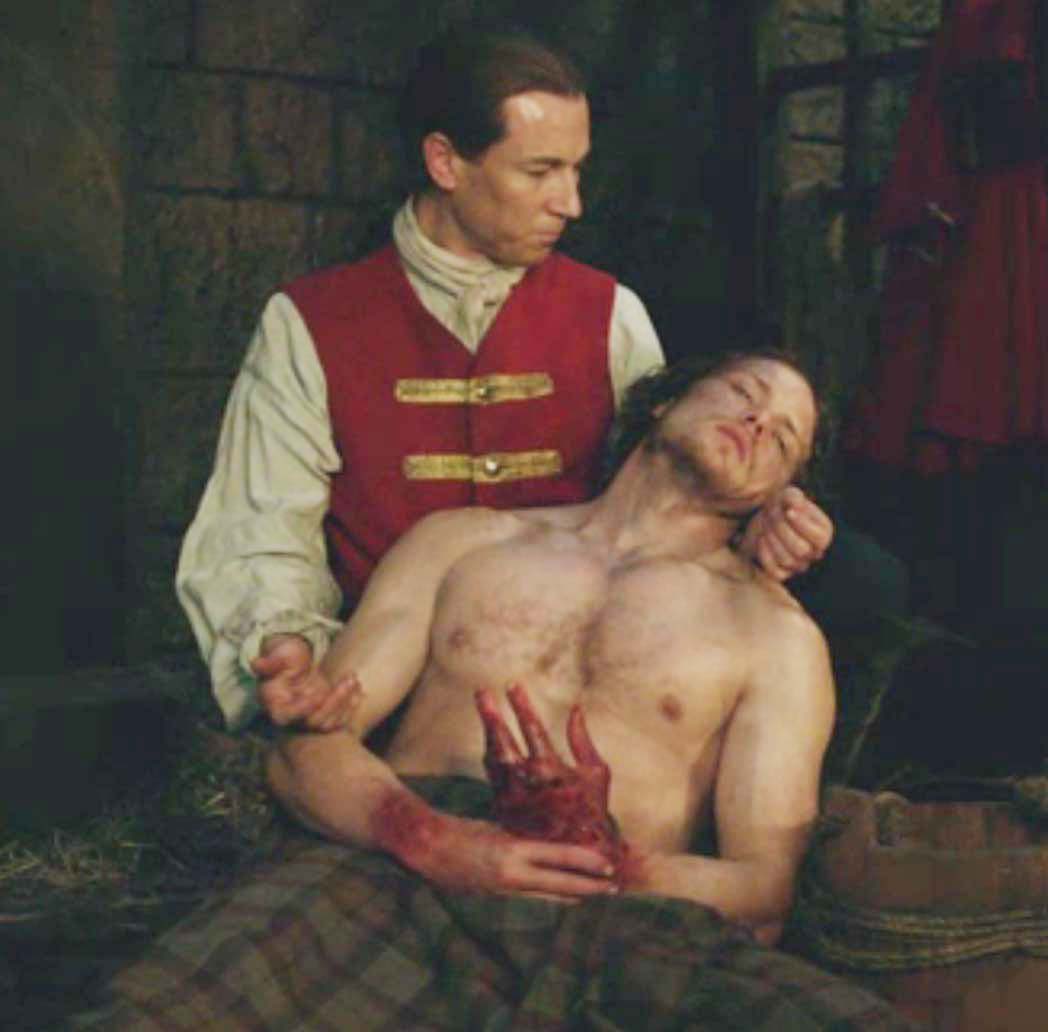
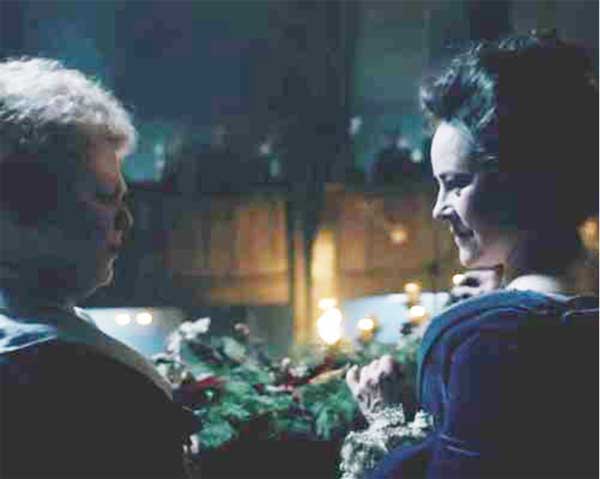
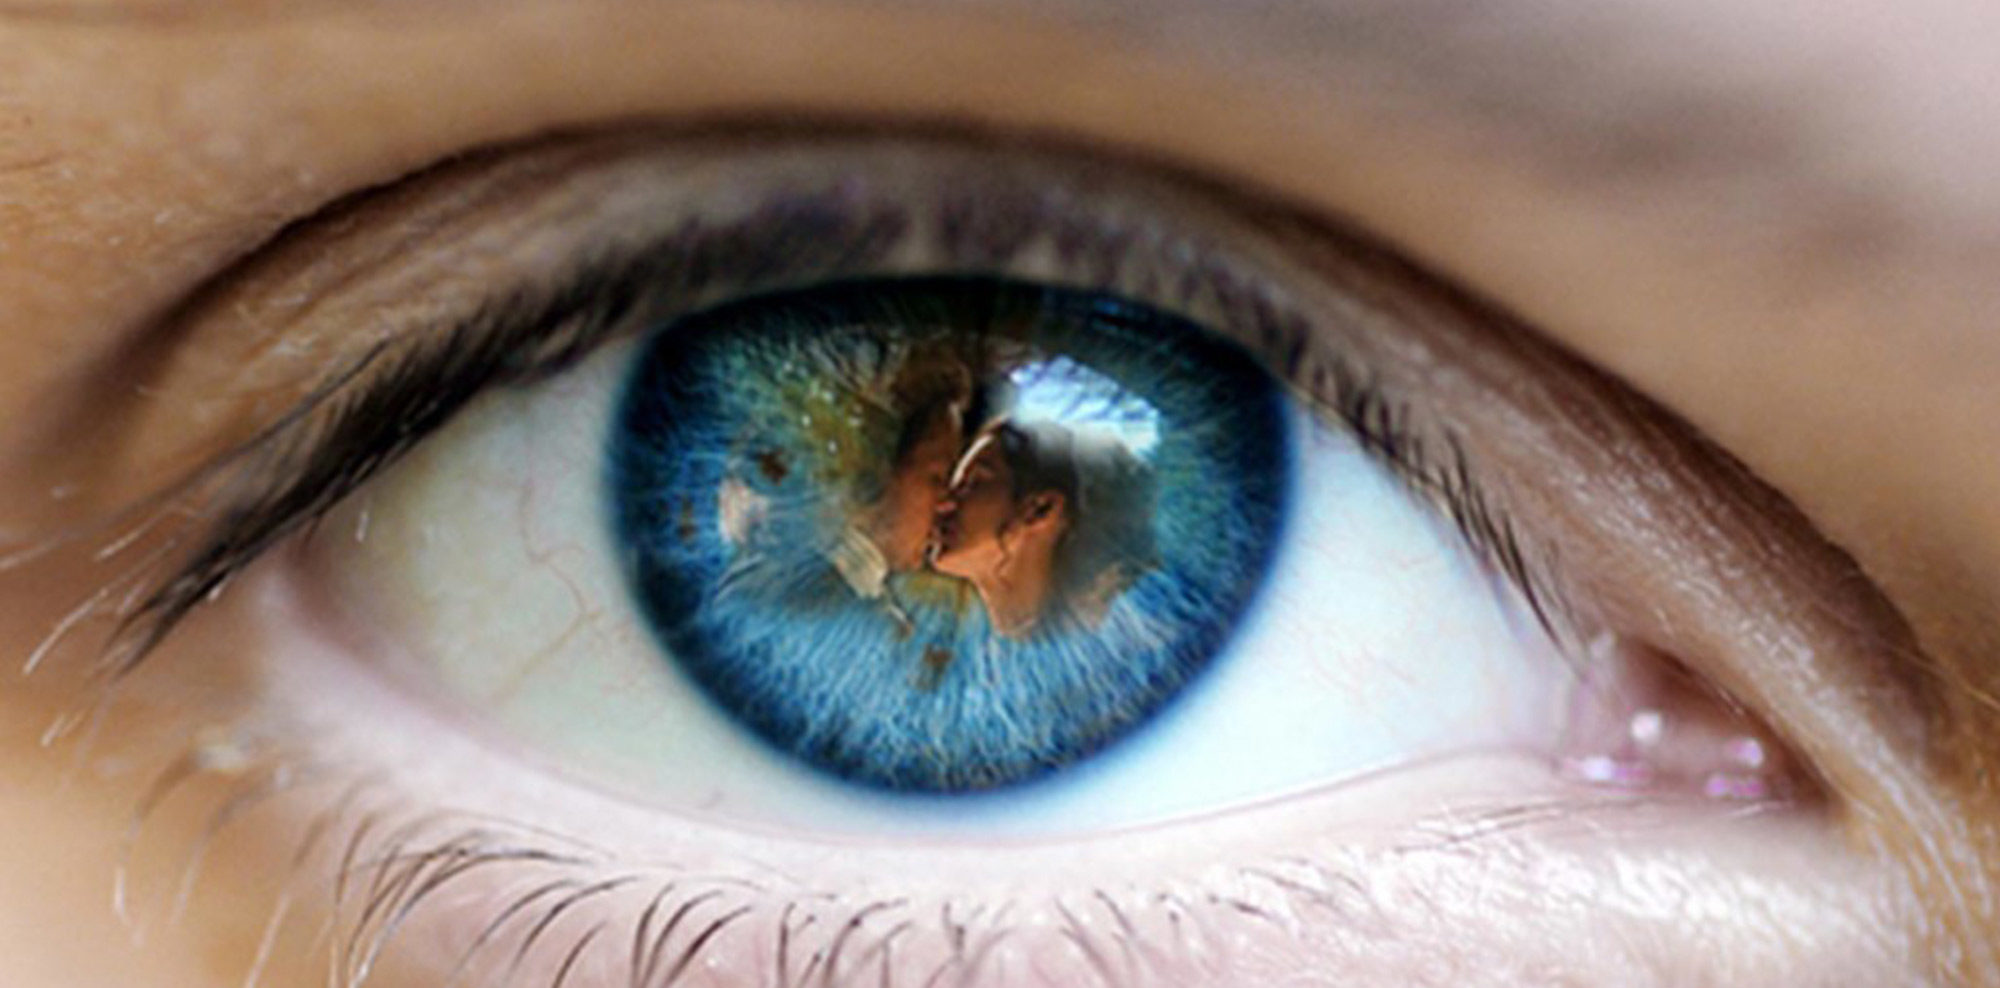
Can we see lacrimation (flow of tears) at work in Starz episodes? Oh, aye! Claire is a strong 20th century woman but I count at least six season one episodes where she weeps. This is my favorite: the lass is touchingly, tenderly tearful while confronting her beloved hubby about his intent to end it all (Starz episode 116, To Ransom a Man’s Soul). Intense emotions have her lacrimal system in full flush!

epi 116 Claire tears KLS edited

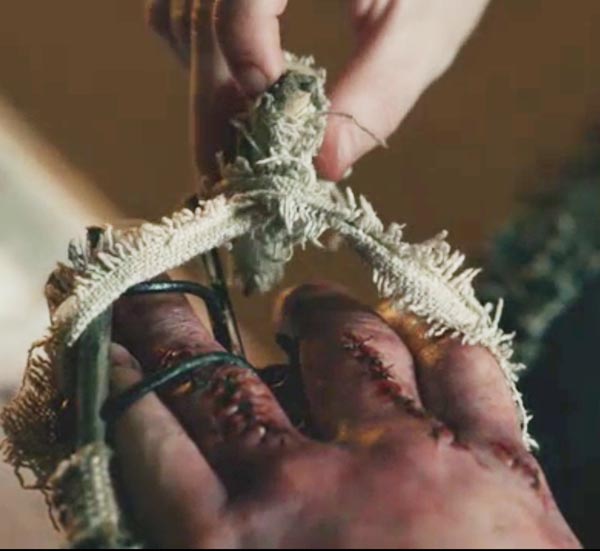
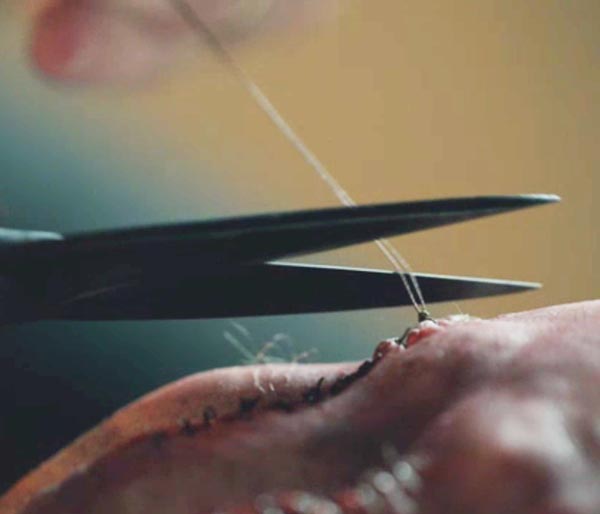
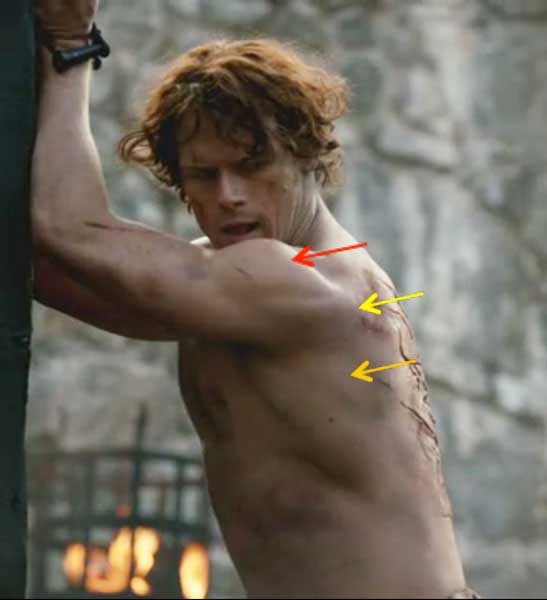
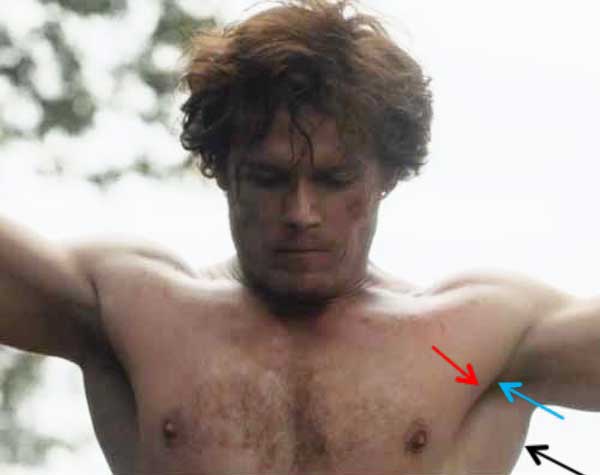
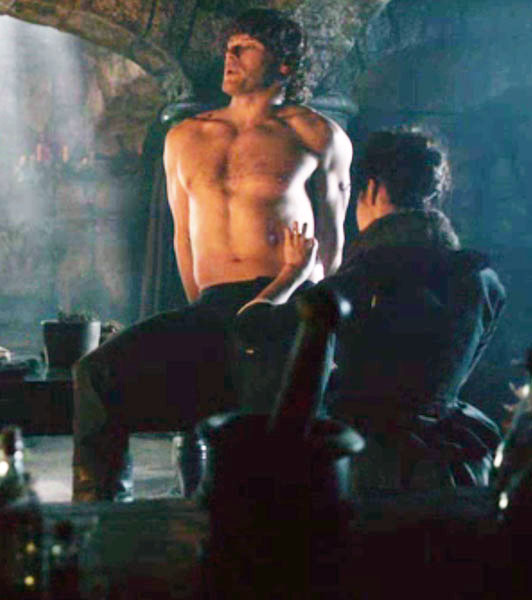
Speaking of crying, Jamie presents us with a gut-wrenching, Emmy-worthy (AHEM!) performance as a single tear overflows his lid and slips down his face. Bound by his word, he stays absolutely still as the wicked wolverine (oops, Wolverton) of Wentworth messes with his scars (Starz, episode 115, Wentworth Prison). Ugh! Puir lad!

ep 115 Jamie tears 03 KLS edited

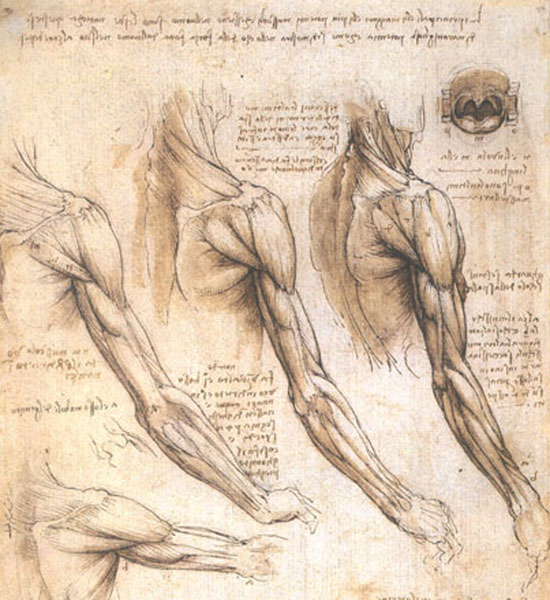
In addition to the above structures, each eyeball is moved by six extraocular muscles (intraocular muscles are inside the eyeball). These are all voluntary, strap-like muscles: four are recti (pl., Latin meaning straight) and two are oblique. The four recti muscles arise at the apex of the bony orbit, pass directly forward and attach to the eyeball like the hours on a clock face. In a left eyeball (Photo L – left eye) superior rectus inserts at the 12:00 position, inferior rectus at 6:00, lateral rectus at 3:00, and medial rectus at 9:00. Understand that the positions of medial and lateral recti are reversed in a right eyeball: medial rectus inserts at 3:00 and lateral rectus at 9:00. Superior oblique and inferior oblique are so named because they approach and insert into the eyeball at oblique angles.
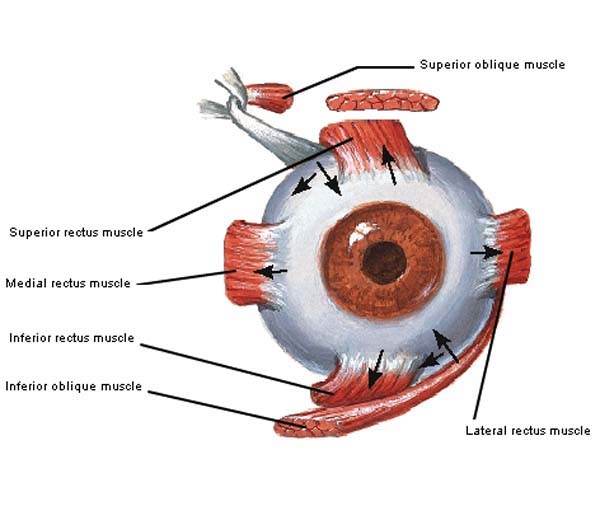
Figure0080C extraocular muscles KLS edited

Figure L

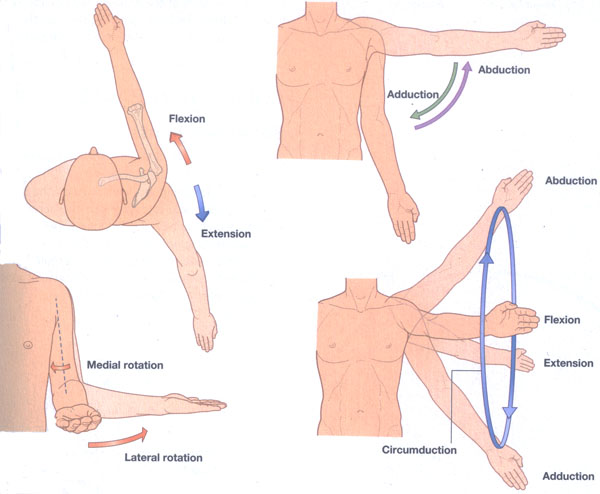
Movements of the head provide coarse adjustments to eye position but the extraocular muscles produce fine movements of the eyes. The four recti move each eye in linear directions: up (elevate), down (depress), toward the nose (adduct) and toward the ears (abduct). Oblique muscles roll each eye inward toward the nose (intorsion) or outward toward the ears (extorsion). The table below shows the main movements attributed to each of the six extraocular muscles. Each of these movements is aided by other extraocular muscles but these combos are beyond the scope of this lesson. Extraocular muscle movements are complex and require activation by three pairs of cranial nerves (from the brain) and several brain centers (too complex for our lesson).

Superior rectus Inferior rectus Medial rectus Lateral rectus Superior oblique Inferior oblique
elevates depresses adducts abducts intorsion extorsion

Each extraocular muscle has a yoke muscle that operates in concert to coordinate the gaze. For example, when we gaze to the right, the left medial rectus adducts the left eyeball and the right lateral rectus abducts the right eyeball. When we gaze to the left, the opposite muscle actions occur. Ditto for the obliques: as we roll our eyes to the right, the right inferior oblique contracts in tandem with the left superior oblique. The opposite muscles engage as our eyes roll to the left.

NOTE: both medial recti muscles adduct our eyes as we examine near objects but we will revisit this issue in the next eye lesson. Personally, I have never known a person who could simultaneously contract both lateral rectus muscles to abduct the eyes (eyeballs point toward the ears) although in an 1837 article from The London Medical Gazette, the author states that some men (?) can perform this maneuver. What about those lassies?

Speaking of maneuvers…get a keek of this! Och! All those lovely eye muscles working in tandem give us that gaze! Gah!

KDkzrNYrTi

A simplistic description of the extraocular muscles at work can be seen at this link https://www.youtube.com/watch?v=f4RxYRpIqLs!

Or, for an interactive and sophisticated version, try this link. It’s a bit involved but here’s how it works: go to the site http://www.bmc.med.utoronto.ca/anatomia/intro.swf, select orbit, then select structure & function, and lastly, select extraocular muscles. On the right is a giant H with a four-arrow circle. Capture the circle with your mouse and move it along the H to activate and view the six extraocular muscles at work. Very cool!

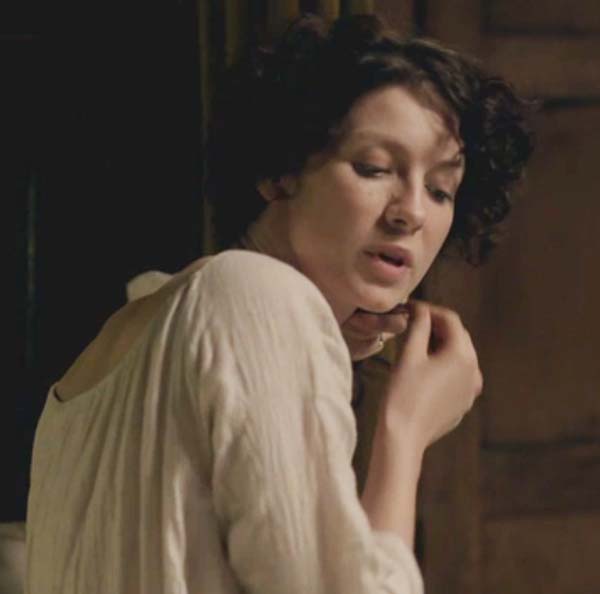
Hey, here’s a novel idea, let’s use more Starz episodes to help us understand eye movements! Time for Claire to hop onto the dissection table: here she contracts both superior recti to elevate her eyes (Starz, episode 103, The Way Out). She’s had, oh, um, roughly one hogshead of Colum’s finest rhenish wine – she canna really recall but enough to drop Angus under the table. Even Jamie is waaay impressed! Claire’s eyes also demonstrate an interesting Eye Rule #1: lift the eyes – lift the lids meaning levator palpebrae superioris (Anatomy Lesson #29) and superior recti muscles contract together.

Try this: close both eyelids. Now attempt to elevate the eyes while keeping the eyelids closed. You’ll find it is difficult to almost impossible because of Eye Rule #1: lift the eyes – lift the lids.  If you can lift your eyes while keeping the lids closed, then per Rudyard Kipling (the (wo) is my addition):

By the livin’ Gawd that made you,

You’re a better (wo)man than I am, Gunga Din!

103 Claire elevation KLS edited

Claire is still in the dissection lab as both inferior rectus muscles contract to depress her eyes (Starz, episode 109, The Reckoning). Note that her upper eyelids are also lowered. She’s totally pissed at Jamie ‘cause his sword belt gave her a licking (Not the only lickin’ she gets. Snort)! Now, I could be wrong, but isna she wrapping her hair with an elastic band in prep for beddy bye sans Big Red One? Har har. Don’t think those bands were invented for another century or so. Eye Rule #2: lower the eyes – lower the lids; as the eyes depress (look down), the eyelids lower; inferior recti and palpebral part of orbicularis oculi contracting together. Yes! Bravo!

Try this: With eyelids widely open, try depressing your eyes. It is possible but verra difficult.

ep 109 Claire depress 01 KLS edited

Ooooh! If looks could kill, Claire would be six feet under right here, right now! Casting the evil eye, wee wily LegHair (dissing the character not the awesome actress!) glares at Claire and Jamie as they share wine, words, gazes and body heat (Starz, episode 103, The Way Out)! Yoked together, her right lateral rectus abducts the right eye and her left medial rectus adducts the left eye. Her eyes are slightly elevated because her head is tilted to the right. Got it? Super-duper!

ep 103 Laoghaire KLS edited

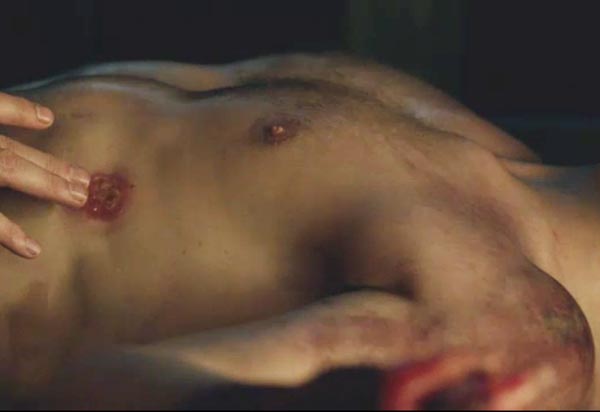
Now, LogHare isna the only character who can coordinate eye movements: fury and fear curdle Jamie’s wame as he watches Black-Jack-Rat run a dagger tip along Claire’s linea alba (Anatomy Lesson #16). He’s so friggin’ mad and scairt he can scarcely contain himself (Starz episode 109, The Reckoning). Yoked together, the right medial rectus adducts his right eye and the left lateral rectus abducts his left eye. Both eyes are also slightly elevated because his chin is tilted down. This keeps his gaze focused on the “object” of interest – rat man. Ye ken? Grand!

ep 109 Jamie abduct adduct 01 KLS edited

Let’s finish this lesson with some interesting tidbits about leeches (Hirudo medicinalis). Ahhh… What do leeches have to do with eyes? Well, hang on and let’s find out! Leeches have a long shared history with humankind. A mural from an 18th dynasty tomb in Thebes shows that leeches were used for medical purposes as early as 1300 B.C. Later, Latin and Greek writers Plautus, Cicero and Horace wrote of medicinal leeches using the names of bdella, sanguisuga or hirudo. The English word leech is from the Old English word “laece,” meaning doctor! Yikes! Today, many modern medical centers employ leeches in plastic surgery and trauma medicine especially to relieve venous congestion (Photo M). Mother Nature at her verra best!
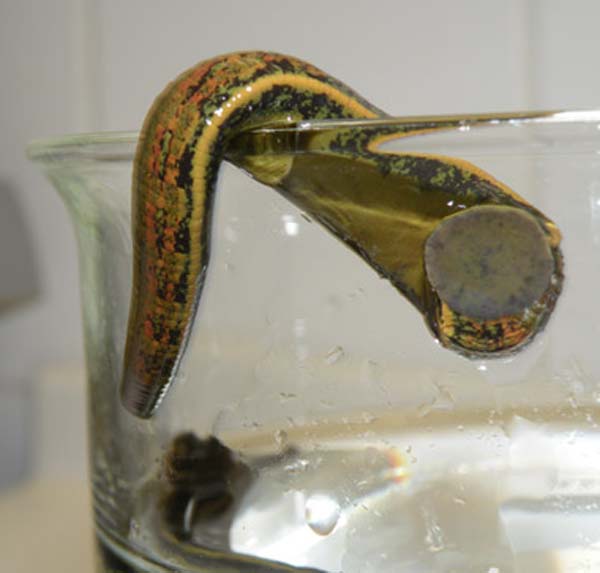
leech KLS edited

Photo M

In the 18th century, medical practitioners transported leeches in special containers. Talk about fancy pet carriers! These beasties were not only placed on the skin but in some pretty hard to reach areas such as mouth, conjunctiva, rectum and vagina (Photo N – 18th & 19th century leech carriers). The clear tube at the bottom of this pic was used for placement in hard-to-reach places!
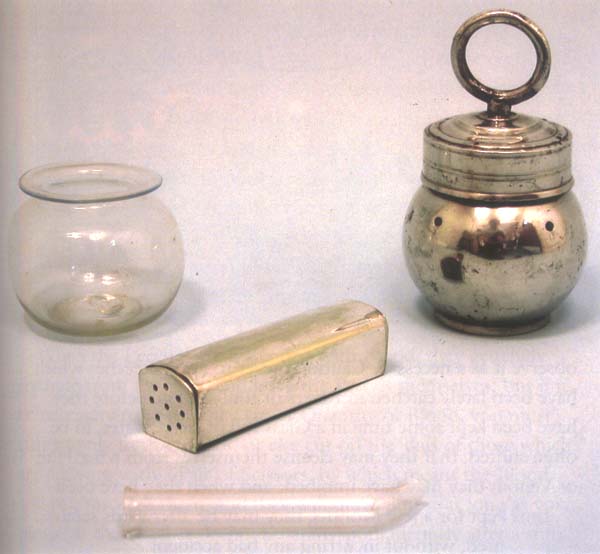
leech carriers KLS edited

Photo N

And, when not being transported, leeches were kept in some verra purty jars. Nice housing, guys!

leech jars KLS edited

Photo O

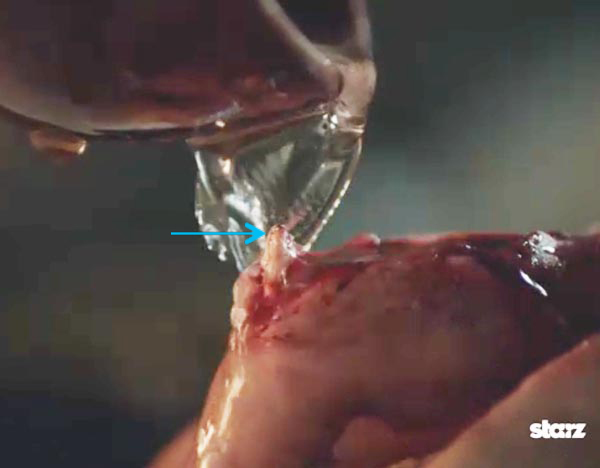
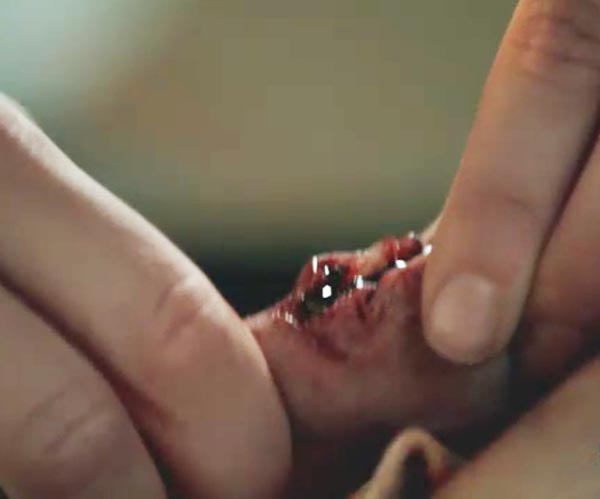
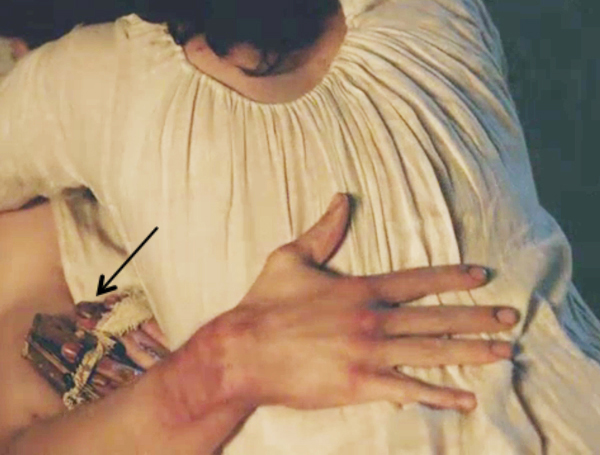
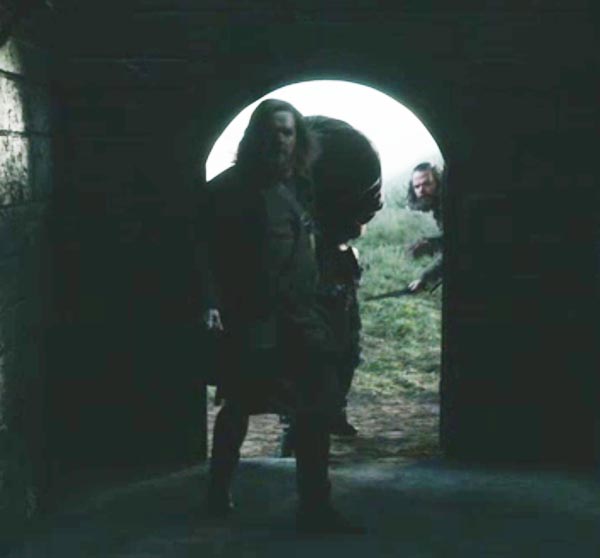
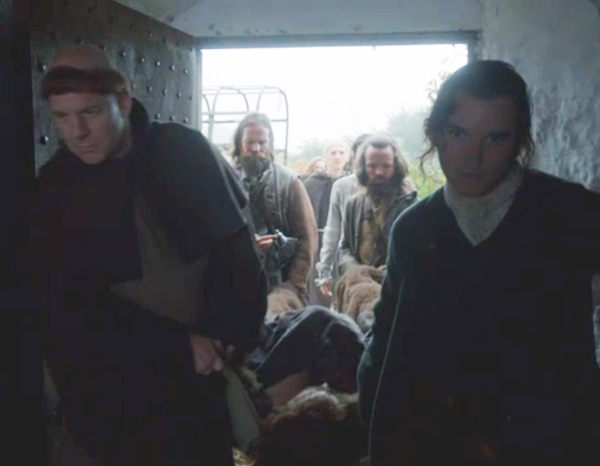
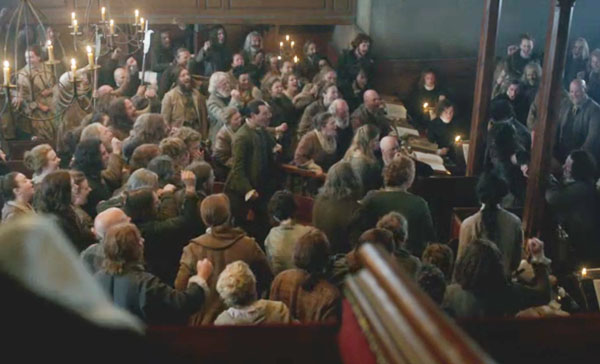
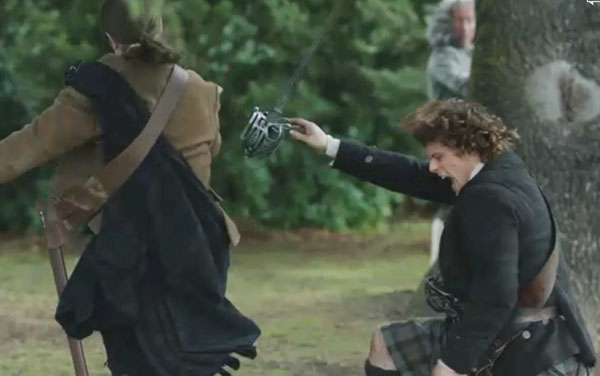
Herself writes about leeches and healing in Outlander book. After Rupert beats Jamie in the great hall, Mrs. Fitz places leeches on his swollen face. Claire describes the event:

“That eye, now, lad, let’s have a look at that.”… “Still bleedin’ under the skin. Leeches will help, then.” She lifted the cover from the bowl, revealing several small dark sluglike objects, an inch or two long, covered with a disagreeable-looking liquid. Scooping out two of them, she pressed one to the flesh just under the brow bone and the other just below the eye… she explained to me, “once a bruise is set, like, leeches do ye no good. But where ye ha’ a swellin’ like this, as is still comin’ up, that means the blood is flowin’ under the skin, and leeches can pull it out… When ye use ’em on an old bruise, they just take healthy blood, and it does the bruise no good.”

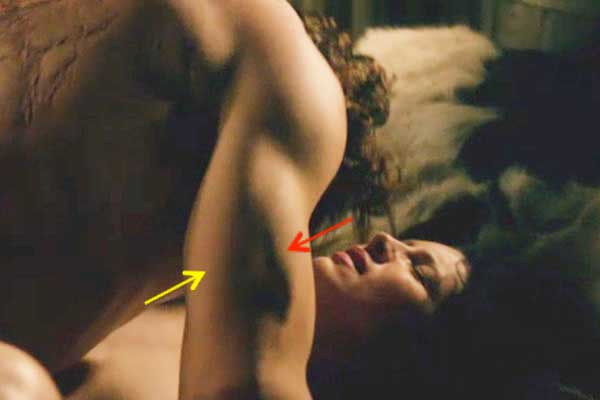
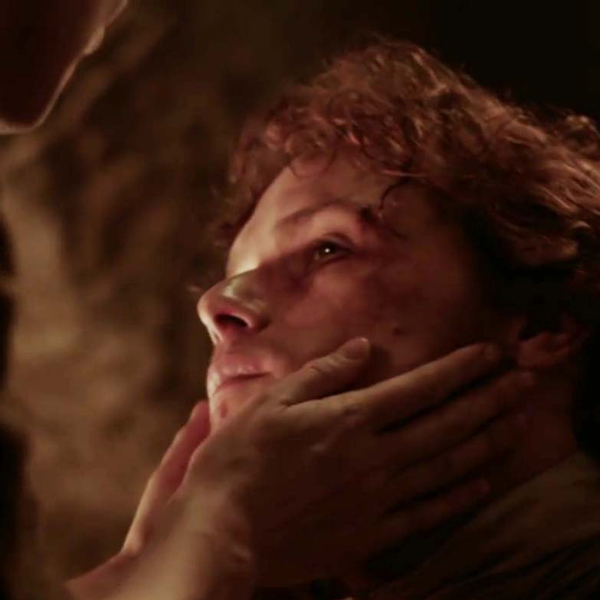
The fabulous leech scene was filmed but edited from the aired version (Starz episode 102, Castle Leoch). So, here’s a wee bit of the deleted footage where Mrs. Fitz works leech magic (purported to be black licorice) on Jamie’s red and swollen left eye and cheek (see gif). Rupert’s eye punch broke blood vessels that hemorrhaged into extraorbital fat and loose connective tissue of eyelids, brow and cheek. Had the punch directly hit the bony orbit and eye, Jamie could have suffered a blowout fracture!

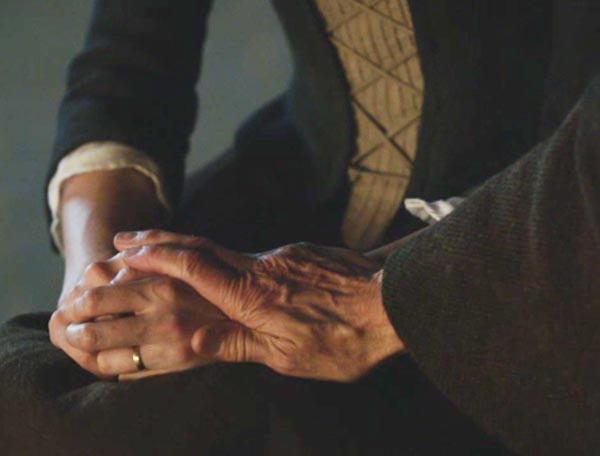
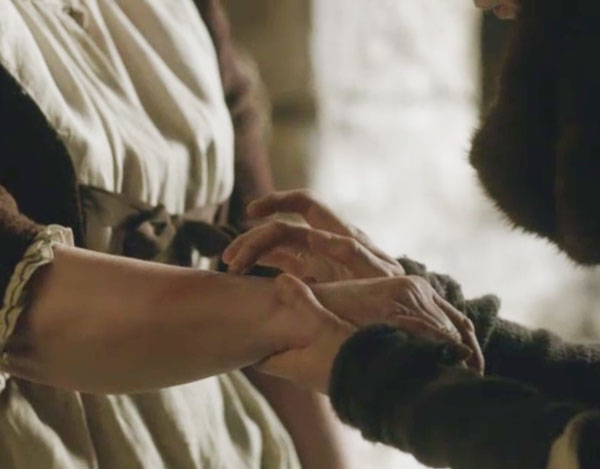
Claire de-claires (ha ha) that the leech-leach induces remarkable improvement, but she also uses this as a chance to cradle Jamie’s face. Yep! This lass just wants to pet that lad’s epidermis!  Hang on, Claire – more skin touching is, erm, coming!

leech-video-01-KLS-edited

Eyes are endlessly amazing and today, we learned more about their accessory structures. Next lesson, we will study the eyeballs! For now, let’s end today’s fascinating topic with a quote about the oblique muscle action from funnyman Jim Carrey:

“Behind every great man is a woman rolling her eyes.”

A deeply grateful,

Outlander Anatomist

photo creds: Starz, www.sussexvt.k12.de.us (warning gif), Medicine: Perspectives in History and Art by R. E. Greenspan, 2006 (Photo O – 19th century leech jars), Netter’s Atlas of Human Anatomy, 4th ed. (Photos B – L), www.aapos.org (image of blowout fracture), www.collectmedicalantiques.com (Photo N – image of leech carriers), www.leeches-medicinalis.com/the-leeches/biology (Photo M – image of leech), www.radiopaedia.org (CT image of blowout fracture), http://funny-pics-fun.com (lemur)

Anatomy Lesson #23: Harming Hands – Helping Hands – Healing Hands

Hallo Outlander Anatomy students! Welcome to Anatomy Lesson #23: The Hand – Part 2. Anatomy Lesson #22 introduced the hand but there is still much more structure and function to learn.

Today’s task is three-fold: to enrich our understanding of hand anatomy, to apply that anatomy using images from Starz episodes and to consider how hands are used. For most of us, our hands are with us throughout life so the way we use them helps define how we work, play and live (Photo A).

So, how do we use our hands? What tasks do we apply them to? Are the tasks helpful, harmful or neither? Outlander books and the Starz series provide abundant examples of hurtful hands, helpful hands and healing hands which are considered in this lesson. Just so we are all on the same page, all Starz images in this lesson are from episode 116, To Ransom a Man’s Soul, unless otherwise stated.

hands of love KLS edited

Photo A

Let’s begin the lesson with a brief review of digit and thumb movements and of the hand skeleton.

Our four fingers (U.S. definition or digits #2-#5) carry out four movements: abduction, adduction, flexion and extension (Photo B). Try all four movements with your own fingers.

finger movements KLS edited

Photo B

Because thumb anatomy differs from that of the fingers, it can perform seven independent movements: abduction, adduction, extension, flexion, opposition, reposition (Photo C) and circumduction (thumb moves in a circle – not shown in Photo C). Try all seven thumb movements.

Reposition (Photo C – right image) is the hand with all digits at rest or repose, a benign anatomical position maintained with little muscular effort.

thumb movements KLS edited

Photo C

In the image below, Claire’s healing hand is held in repose/reposition as she offers comfort to an angry, distraught guilt-ridden Jamie:

“Dinna touch me!” … “You canna save a man that doesna want saving!”

epi 116 good hand in repose KLS edited

Next, consider the crazy creepy crawler’s hand reaching for Jamie, the “object” of his obsession (Starz episode 115, Wentworth Prison). The palm is turned from our view but consider his hand. Is it at rest? Is it neutral? Anatomically, BJR’s hand yearning for Jamie is very nearly in reposition and although it may seem benign, we know it portends great harm. There’s a keen difference between anatomical positions of the hand and the intent behind such positions.

ep 115 BJR hand KLS edited

Next, let’s review bones of the hand (Anatomy Lesson #22). The complex skeleton of the hand contains 27 bones (Photo D – left hand, palm up): 8 carpals in the wrist, 5 metacarpals in the mid-hand and 14 phalanges in the digits. Each finger (digits #2-#5) contains three phalanges but the thumb (digit #1) has only two.

The bones of the hand create many joints (Photo D):

    • blue arrow shows wrist joints (between forearm and carpals)
    • orange arrow shows carpometacarpal joints (CM)
    • green arrow shows metacarpophalangeal joints (MP)
    • turquoise arrow shows proximal interphalangeal joints (PIP)
    • black arrow shows distal interphalangeal joints (DIP)
    • red arrow shows a single interphalangeal joint (IP) of thumb.

hand-bones-KLS-edited

Photo D: ©Stockmedicalart.com 2012

This creative rif on “The Scream” by Edvard Munch (Photo E) warns us that up next is toxic/nuclear waste in the form of handiwork by the bloody black-hearted bastard. In this lesson, I do resort to name calling – I canna help it when it comes to that wicked wretch!

hazard-symbol-munch-scream KLS edited

Photo E

Now for applied anatomy, first of the hand bones: the villainous Jack-Hammer mangled the bones of Jamie’s left hand (right hand in the book) such that Claire is tasked with treating nine fractures. From herself’s own words (Outlander book):

…”A single broken finger is enough to sink a strong man to his knees with nauseated pain…“I carefully picked up the smashed right hand, bringing it into the candlelight for examination. It would have to be set, and as soon as possible. The injured muscles were already clawing the fingers inward.

“It was a long, horrible, nerve-wracking job….. some parts, such as the splinting of the two fingers with simple fractures, went quite easily. Others did not…. I set his middle finger, exerting considerable force necessary to draw the ends of the splintered bone back through the skin.

The next image shows a compound or open fracture of the proximal phalange of Jamie’s middle finger. Compound fractures are characterized by broken bone(s) protruding through the skin and indeed the distal broken fragment is clearly visible (aqua arrow) as Claire rinses it with clean (sterile) water.

ep-116-compound-fracture-KLS-edited

Claire retracts the tip of Jamie’s finger pulling the bony fragment back into the finger. She then approximates the broken ends of the phalange. Retraction could require some effort because following a fracture, attached muscles undergo spasm to form a “natural splint” designed to keep the broken ends of a bone together as much as possible. This explains the quote from Outlander book:

“The injured muscles were already clawing the fingers inward.”

ep 116 compound fracture 01 KLS edited

And a final quote from Outlander book:

“All five fingers eventually lay straight as new pins, stiff as sticks in their bandaged splints… By good luck, only the one joint had been badly damaged…there was nothing I could do about the cracked metacarpal bones or the puncture wound.”

As Claire applies her skills to Jamie’s battered hand, she stitches the lacerations and places his hand on a small wooden pallet. She binds the badly damaged ring finger to the little finger using the latter as a split. All is then secured with a linen strip wound around a wooden peg that is then inserted into a hole in the wood pallet. Wow! This is so impressive and resourceful as no knots are require; the peg can be removed, the strip unwound and the wound attended without messing with knots. Overall, this ingenious device is an external cage which stabilizes the hand in the proper anatomical position and immobilizes it during the healing process. Brilliant!

Finally, did you ken the red, purple, and dusky blue bruises forming on Jamie’s hand? There is more about bruising later in this lesson.

ep 116 hand cage KLS edited

Now for applied anatomy of joints of the hand: in this jarring scene, we see the MP joints (green arrows) of BJR’s right fingers. He tells a traumatized Jamie “I know you can do better than this,” tapping the tip of his nose as one might correct an errant child. The total absence of regard for Jamie’s suffering tells us that the cunning cruel Captain does dwell in darkness and in darkness he shall remain.

ep-116-BJR-I-know-you-can-do-better-KLS-edited

Next, the unholy-one eyes Jamie writhing in agony: “Am I close? Have you reached your limit yet?” Oozing an air of utter boredom and sure knowledge of outcome, the mad menacing maniac sits with flexed left fingers that clearly display his left PIP joints (aqua arrows).

ep-116-BJR-have-you-had-enough-KLS-edited

Soon, BJR instructs Jamie to brand himself with BJ’s glowing wax seal stamp – over the left breast and near the heart. “Are you mine? Show me … do it!” The red arrow shows the flexed IP joint and the green arrow indicates the flexed MP joint of Randall’s right thumb. Remember: the thumb has only two phalanges with one IP joint shared between them.

ep-116-branding-Jamie-02-KLS-edited

Wracked with pain, Jamie brands himself but stubbornly sears his left side; his heart belongs to Claire! The flexed DIP joints (red arrows) are visible on Jamie’s right fingers as he grips the stamp.

ep-116-branding-Jamie-KLS-edited

Remember the anatomical mantra: the more bones in a body part, the more possible joints between the bones; the more joints, the more possible movements at the joints? Bone movements occur when muscles that attach to them undergo contraction. So, to better understand hand movements, we must next consider muscles operating the hands.

In Anatomy Lesson #22 we learned that some forearm muscles move bones of the hand. To review, the forearm is divided into two compartments. The anterior compartment contains eight muscles six of which attach to bones of the palmar (front) hand. The posterior compartment contains 12 muscles nine of which attach to bones of the dorsal (back) hand. Covering all the forearm muscles that move hand bones isn’t feasible in a single lesson, so let’s consider a few.

Three important muscles originate from the anterior forearm and end on bones of the digits; these are the long flexor tendons.

The first muscle is flexor digitorum superficialis or FDS (Latin meaning superficial flexor of digits); this muscle arises from humerus and radius (Photo F). Near the wrist FDS splits into four tendons, one to the intermediate phalange of each finger. Contraction of FDS mainly flexes PIP joints (Anatomy Lesson #22) but continued contraction flexes MP and wrist joints.

Try this: strongly flex (curl) your fingers and wrist joint. You used FDS to accomplish this. Identify wrist, MP and PIP joints. Flexion of these joints is critical for the grip (Anatomy Lesson #22).

Figure0426A FDS KLS edited

Photo F

Please think, if the digits have a superficial flexor will they also have a deep flexor? If you answered yes, then you are getting the idea of anatomy! The next anterior forearm muscle is flexor digitorum profundus or FDP (Latin meaning deep flexor of digits). Deep to FDS, FDP (Photo G) arises from the ulna and breaks into four tendons near the wrist to end on the distal phalange of each finger.

Now consider this: if tendons of FDS insert on the intermediate phalanges how will tendons of the deeper-lying FDP reach the distal phalanges? The body’s answer is ingenious! FDP goes through FDS: all four tendons of FDS split to allow FDP tendons to reach the distal phalanges (Photo G – red arrow). Do you see the splits? The engineering is awesome!

FDP flexes the DIP joints but it also contributes to flexion of PIP, MP and wrist joints.

Try this: Attempt to flex only the DIP joints of your fingers. Can you do it? I know a few folks who can but it is unusual. DIP joints typically flex in conjunction with PIP joints.

Figure0426B-FDP-KLS-edited

Photo G

The third muscle of the anterior forearm is Flexor Pollicis Longus or FPL (Latin meaning long flexor of thumb). FPL originates from the radius and inserts on the distal phalange of digit #1, the thumb (Photo H). Its major action is to flex the IP joint of the thumb but continued contraction also helps flex the MP joint.

Try this: flex your thumb and find the IP joint. Flexion is caused by FPL.

Figure0426B FPL KLS edited

Photo H

Do you recall those eight carpal bones arranged in two rows of four bones each (Anatomy Lesson #22) – aye, the ones with the funny mnemonic? These bridge the gap between radius and ulna and five metacarpals. More than a dozen strong fibrous wrist ligaments bind together carpals, metacarpals, radius and ulna (Photo I –  grey strands).

Figure0437B carpal arch KLS edited

Photo I

Two-dimensional images imply that the carpals lay in a flat plane, but this is not so. Wrist ligaments secure them into a curved carpal arch that is convex on the dorsum and concave on the palmar surface (Photo J – curved red line). The carpal arch is spanned by a fibrous sheet, the flexor retinaculum thus forming a potential space, the carpal tunnel (Photo J). But, the tunnel is NOT empty because it contains four FDS tendons, four FDP tendons, one FPL tendon and the median nerve (Anatomy Lesson #22).

Now for an important clinical correlation: truly a tight squeeze, any swelling of structures within the carpal tunnel compresses the median nerve and affects hand areas it subserves, a condition known as carpal tunnel syndrome. Symptoms may include tingling, numbness and pain with reduced strength of thumb and index, middle and half the ring fingers. Repetitive motions that over-extend the wrist such as keyboard use, piano playing, or prolonged use of vibrating tools may be contributing factors.

Figure0444B-Carpal-tunnel-KLS-edited

Photo J

Next, we consider the muscles of the back of forearm and hand: known as long extensor tendons, several muscles reach from posterior forearm to bones of the hand. We won’t name these but to summarize: three long tendons extend the wrist (Photo K – blue arrows) and 5+ long tendons extend the finger joints (Photo K – red arrows). Three long tendons extend and/or abduct the thumb (Photo K – black arrows). Whew!

Figure0424A-long-extensor-tendons-KLS-edited

Photo K

A closer view at the dorsal hand shows long extensor tendons as they cross the wrist. These tendons are held in check by a fibrous band, the extensor retinaculum (Photo L – black arrow). Note bands of fibrous tissue between the long extensor tendons. Known as intertendinous connections they augment extension of the fingers as a unit; if one extensor muscle contracts, it helps activate its neighbors (Photo L).

Try this: Intertendinous connections are quite variable but let’s try to locate one. Place forearm and hand flat on a surface. Pronate the forearm to expose the back of your hand. Try to lift (extend) just the little finger. Can you do it? Next, lift ring, middle and index fingers one at a time. Are some fingers harder to lift independently? I have greatest difficulty lifting middle and ring fingers independently so I know they are bound by an intertendinous connection. Try to locate one of yours.

Figure0453A-Extensor-tendons-KLS-edited_1

Photo L

Now, let’s consider intrinsic muscles of the hand beginning with the palmar surface. Palmar skin is tightly bound to an underlying fibrous sheet, the palmar aponeurosis, a feature that aids grasping (Photo M – red arrow). Two superficial muscles are apparent: palmaris longus and palmaris brevis. A forearm muscle, the tendon of palmaris longus blends with the palmar aponeurosis and tenses it during contraction. Many anatomists regard palmaris longus to be a vestigial muscle because it is absent in about 14% of people and its absence doesn’t really affect our ability to grip. Palmaris brevis is a tiny postage stamp-sized muscle near the base of the little finger (Photo M); its contraction puckers the palm skin and deepens a cupped palm.

Figure0442A-palmaris-longus-&-brevis

Photo M

Try this: Spread your digits and tap your palm. Feel that taut springy tissue? That’s the palmar aponeurosis. Now, bring pads of thumb and little finger together and strongly flex the wrist. Does a tendon stand out in the midline (Photo N – black arrow)? If so, this is palmaris longus. Repeat with the opposite side. What is the pattern of your forearm? Do you have two palmaris longus muscles, one or neither? Turns out I have one on the left but none on the right.

Palmaris longus KLS edited

Photo N

I love watching Jamie balance and twirl a dirk on the palm of his hand (Starz episode 105, Rent). See the puckered flesh at the base of his palm (red arrow)? This is caused by contraction of palmaris brevis to help cup his palm and support the dirk. Yep, Jamie has one! Is Claire watching his clever performance? Aren’t we all?

ep-105-palmaris-brevis-KLS-edited

The hand contains 19 intrinsic muscles (including palmaris brevis), meaning they arise and insert within the hand itself. These small muscles initiate fine movements of the digits. It would be tedious to name them all so understand that the thumb has four intrinsic muscles concerned with flexion, opposition, adduction and abduction (Photo O – green overlay). The little finger has three muscles which flex, oppose, and abduct (Photo O- purple overlay). Between the long flexor tendons and metacarpal bones are 11 additional muscles (lumbricals and interossei) which help flex, abduct and adduct the fingers (Photo O – black arrows). All totaled a whopping 34 forearm and hand muscles are involved in hand movements!

Figure0443B-intrinsic-hand-muscles-KLS-edited

Photo O

Like most body parts, the hand needs a blood supply. The large ulnar and radial arteries descend through the forearm, cross the wrist to form superficial and deep palmar arches (Photo P). Branches from both arterial arches produce two small arteries (proper palmar digital arteries) for each finger. The radial artery supplies branches to the thumb. The dorsal hand (not shown) has a smaller arterial arch that produces two more small arteries to each finger. Ergo, each finger has four supplying arteries; the thumb has three.

Figure0449B-palmar-arterial-arches-KLS-edited

Photo P

For those who do not understand blood flow, a full lesson on this subject lies in the future. For now, please know that the digital arteries carry blood ladened with oxygen and nutrients to the digits. They divide into smaller arterioles which branch into microscopic capillaries forming capillary beds (Photo Q). In the capillary bed, oxygen and nutrients are exchanged for carbon dioxide and waste products. The capillary bed reforms into venules that unite to form veins draining blood from the tissues. This general plan is followed throughout the hand and in most body tissues.

capillary bed KLS edited

Photo Q

Time for a clinical correlation about blood supply: capillaries have very thin walls. When subjected to trauma, these vessels burst leaking blood into surrounding soft tissues. Extravasated blood presents as a contusion, a reddish-purple-dusky discoloration which doesn’t blanch when pressed: the classic “black and blue” bruise (Photo R).

Bruising KLS edited

Photo R

Several students have inquired about Jamie’s blackened hand and digits following his rescue from Wentworth Prison. They were concerned that his hand exhibited tissue necrosis or gangrene. But no, discoloration is due to the beating administered by that depraved, demented devil. This gut-wrenching scene gives evidence of early bruising (black arrow): a vivid color range from deep red to purple to dusky blue. Very convincing!

ep-116-Jamies-hand-on-Claires-back-KLS-edited

Later on the Cristabel, Jamie’s thumb and fingertips are fully black and blue. The pounding mallet did a number on his hand capillaries and the bruising is fierce!

ep 116 Jamies hand on ship KLS edited

We are done with the real and applied anatomy lesson so let’s finish with examples of how hands are used in Starz episode 116 To Ransom a Man’s Soul.

“Dear God, you are a magnificent creature” utters the crazy cunning cutthroat with Jamie spread across his lap. As I gazed at this imagery, it seemed vaguely familiar. Then, B-I-N-G-O!

ep 116 BJR holding Jamie KLS edited

Intentional or not the position, posture and attitude are very nearly a mirror image of the Pietà, a Renaissance sculpture by Michelangelo Buonarroti (1475-1564) of the Madonna cradling a crucified Christ. This riveting juxtaposition of images reveals universal opposites: dark versus light; evil versus good; cruelty versus mercy, all deeply rooted themes in Diana’s works. Randall even draws the analogy to Jamie’s suffering: “Ah, so that’s your plan; to submit like Christ on the cross?” Helping hands, healing hands, or hurting hands. No brainer, here!

Pieta KLS edited

Later, the foul, festering fiend sensuously rubs lavender oil into Jamie’s painful burn telling him “These are Claire’s hands. Think of your wife.” There are new bruises on Jamie’s left shoulder. We don’t know what caused these – mayhap a mallet blow went astray? We shouldna be deceived by this perceived gentleness because BJ is about to deliver extreme mental pain to Jamie. Hurting hands, helping hands, healing hands?

ep 116 BJR these are Claire's hands KLS edited

After suffering hours of agonizing pain, BJ tells Jamie to:

“Think of Claire. Think of your wife. Wait for me. Claire’s here.”

Sadly, the soulless one said he would have Jamie’s surrender before he left this world and he does. Then BJ delivers his cruel, mocking coup de grâce: “I understand. How could she ever forgive you?” His hands are made for hurting and they are remarkably skilled at their work!

ep 116 how can she forgive you 01 KLS edited

Ugh! Enough of hurting hands…How about some healing hands? We already witnessed Claire’s healing hands as she cleanses and sets Jamie’s battered hand. Here she tidily stitches his skin lacerations. Her competency as a 20th century WWII combat nurse, her ingenuity at using 18th century tools and her brilliant, fertile mind are testimonies of her love and devotion to Jamie. Her hands have come to his rescue over and over throughout the Starz series; a true symbol of healing.

ep 116 stitching KLS edited

We’ve seen Claire reset Jamie’s broken bones and mend his wounds. Picking lavender, grinding buds in a mortar and pestle to make oil of lavender is yet another example of her healing hands as she prepares to enter the darkness with Jamie.

ep 116 lavendar oil KLS edited

As she rests her healing hand on her husband, he struggles with shame and self-loathing. “You belong to no one else but me…Well, Randall had your body but I’ll be damned if he has your soul as well.” Go Claire! Ye make us proud!

ep 116 Claire helping hands KLS edited

Finally, Godfather Murtagh’s healing hands are at work as he cuts JR from Jamie’s skin and casts the scrap into the fiery furnace! Mercifully, healing hands are plentiful in Starz episode 116.

ep 116 removing brand KLS edited

Let’s finish this lesson with examples of helping hands. First is a fantastic image of the three Highland musketeers rescuing Jamie from the “thug under the door.” Murtagh stolidly carries his precious cargo from Wentworth Prison to freedom. Angus furtively peers backward with dirk in hand while Rupert rides shotgun! Yeah, helping hands! Ye made me weep with relief!

ep 116 helping hands 02 KLS edited

So many helping hands at the monastery reach out to the party of Highlanders offering refuge, supplies and care for Jamie, wounded in body and soul.

ep 116 helping hands 03 KLS edited

More helping hands as the goodly Father comforts Claire after her confession: a far cry from Father Bain, no?

ep 116 priest helping hands KLS edited

Finally, we catch Angus’ au revoir kiss but did ye ken that the wee laddie’s helping hand helps itself to some of Claire’s personal real estate? Naughty Angus Mhor!

ep 116 Angus & Claire KLS edited

Helping hands, healing hands, hurting hands… how shall we use our own? Mine will continue to write lessons throughout the summer although most will be shorter and less complex. Thanks to all who love anatomy and Outlander!

Oh! Last week, I was invited by Jennifer Barnes, Ryan Hooks and Keetin Marchi (they are such great fun!) to give a mini anatomy lesson about the hand on the Outlander Aftershow at TheStream.TV. You can see it below around 16:30. Now that we face another bout of withoutlander, you can join our friendly hosts for the Outlander Book Club on Monday nights where they compare and contrast the book and the show: http://bit.ly/1dqHXxQ. Happy Summer!

The deeply grateful,

Outlander Anatomist

Follow me on:

Photo creds: Sony/Starz, Netter’s Atlas of Human Anatomy, 4th ed Gray’s Atlas of Anatomy for Students, 2005, ClinicallyOriented Anatomy 5th ed, www.artsology.com, www.imgbuddy.com, www.medicalartlibrary.com, www.parlmreadingperspectives.wordpress.com, www.wikipedia.org, www.wikiradiography.com, www.shutterstock.com

Arms! Arms! Arms! – Redux

Welcome to today’s Anatomy Lesson #20: Arm and Forearm! Dapper Edward Gowan, romantic soul he, introduces our topic. Bless neat Ned’s heart – he is the only inhabitant of Castle Leoch courageous enough to defend our beloved Claire at the witch’s trial (Starz episode 111, The Devil’s Mark). Not only is he clever and adroit at turning an argument on its head but after Claire and Geillis are sentenced to burn, he brandishes a pistol and threatens the entire assembly: “Wait, you cannot do this. I forbid this!” Who knew he was armed mayhap with the same firearm he used to shoot a Grant from 20 paces (Starz episode 108, Both Sides Now)! Reminds me of an apropos John Wayne quote: “Courage is being scared to death and saddling up anyway.”

Way to go Ned. You are the man!

ep 111 Ned 01 KLS edited

Today’s lesson will build on Anatomy Lesson #19: “To Arms, Too arms, Two Arms” wherein we learned about clavicle, scapula and humerus and the 17 muscles that move these bones. Today’s lesson adds more details of the glenohumeral joint and covers eight additional muscles that move arm and forearm. Do the math and realize that five muscles of arm and pectoral girdle haven’t been covered. We will return to those in a future lesson.

Let’s begin by reviewing arm movements (Photo A). Hopefully you memorized these from our last lesson: flexion, extension, adduction, abduction, medial (internal) rotation, lateral (external) rotation and circumduction. Understand that arm movements can involve combinations of the above.

arm movements KLS edited


Photo A

Now, onto the bony foundations of the upper limb; yes, there is more to learn. Movement enjoyed by humans requires a bony endoskeleton (endo from Greek meaning within) for muscular attachments. This haunting artistic rendering reminds us of scapula, clavicle (together the pectoral girdle), humerus and forearm bones all of which provide attachment for upper limb muscles.

upper limb bones KLS edited


Photo B

As you may recall the glenohumeral joint is the articulation between humeral head and glenoid cavity of scapula (Photo C). The glenoid cavity is roughly ¼ the size of the much larger humeral head meaning this ball and socket joint is highly mobile but easily dislocated as happened to our bonny Jamie (Anatomy Lesson #2 and Starz, episode 101, Sassenach).

Examine Photo C (slice through shoulder joint) and see that a blue layer covers humeral head and lines glenoid cavity; this is hyaline (articular) cartilage which covers most joint surfaces. The body contains three different types of cartilage but the most common type is hyaline. Cartilage is one of several body tissues that are avascular (lack blood vessels). Thus, in the case of cartilage, oxygen, nutrients and protective/repair cells are delivered and waste products are retrieved more slowly. The significance is this: if damaged, cartilage repair is slower to repair than vascular tissues. Warning: piercing cartilage (e.g. ears, nose) demands extra caution to keep wounds disinfected during the healing process. Once infected, the damage to cartilage can be fulminating because the tissue is avascular. The structure labelled glenoid labrum is important and will be discussed next.

Figure0406D glenoid labrum KLS edited

Photo C

Some readers have inquired about the glenoid labrum, a part of the glenohumeral joint that is made of fibrocartilage (different than hyaline). It enlarges and deepens the glenoid cavity to more effectively surround the humeral head (Photo D – side view of right joint). Labrum injuries are fairly common and include symptoms such as pain, locking, popping, joint instability and decreased range of motion. Because the labrum is made of soft tissue, it cannot be visualized by x-ray and thus requires other imaging modalities.

glenoid labrum KLS edited

Photo D

The glenohumeral joint (Anatomy Lesson #2 & Anatomy Lesson #19) is further reinforced by the rotator cuff, an incomplete collar of four muscle tendons (Photo E – superior view, black arrows). Rotator cuff muscles are: supraspinatus, infraspinatus, teres minor and subscapularis. Some anatomists prefer the less common term fibrous cuff because not all cuff muscles rotate the humerus as the name implies. And, in case you are not aware, tendons are connective tissue (collagen) elements that anchor muscle to bone; ligaments are connective tissue elements that attach bone to bone.

Figure0408A-rotator-cuff-KLS-edited

Photo E

Referred to by the acronym SITS, rotator cuff muscles cover and reinforce top, back and front of each glenohumeral joint. Photo F (left humerus, left hand) employs a simple visual technique for recall: S (index finger) = supraspinatus; I (middle finger) = infraspinatus; T (ring finger) = teres minor and S (thumb) = subscapularis.

rotator cuff KLS edited

Photo F

The first SITS muscle is supraspinatus so named because it arises from back of scapula superior to the scapular spine (Photo G). Its tendon passes over the top of glenohumeral joint and inserts into side of humerus. Called the workhorse of abduction, it actively raises the arm from full adduction to full vertical abduction as in hands up, partner!

The second SITS muscle is infraspinatus so named because it arises from back of scapula inferior to the scapular spine and inserts into back of humerus. Upon contraction, it produces lateral (external) rotation of the arm.

The third SITS muscle is teres minor, a small muscle that arises below infraspinatus and inserts into back of humerus. Often fused with infraspinatus, it may be indistinct. Teres minor contributes to lateral rotation of the arm.

Figure0408C supraspinatus KLS edited

Photo G

The fourth and last SITS muscle is the fan-shaped subscapularis which takes origin from front of scapula and inserts into front of humerus (Photo H). Its contraction produces medial (internal) rotation of the arm.

In summary, all SITS muscles rotate the humerus except one abductor, supraspinatus.

Again, the tendons of the four SITS muscles reinforce the glenohumeral joint as the rotator cuff (Photo H – dashed red line). One or more of these tendons is a common cause of shoulder pain, tears, impingement and/or inflammation. I cannot demonstrate subscapularis with Starz images because it is situated deeply between scapula and rib cage.

Figure0408B-subscapularis-KLS-edited

Photo H

But, I can demonstrate three SITS muscles using our fav model, Jamie! Aye, the obliging laddie hopped up on the dissection table again – he’s so accomodating helping us all learn about human anatomy. Thank ye, Jamie! In the next image, Claire’s graceful right index, middle and ring fingers rest over his awesome trapezius (Starz episode 108, The Wedding). Supraspinatus lies deep to the yellow arrow; it doesn’t create a distinct bulge (hehe) because it is covered and overshadowed by the more powerful trapezius. Nevertheless, we can identify its location.

ep-107-biceps-triceps-KLS-edited

Can we see Jamie’s infraspinatus? Definitely yes! In fact, there are so many fine examples from Starz episodes it is difficult to choose. But here are a couple of favorites. Jamie’s infraspinatus is verra well-developed – doubtless from pitching hay all day at Lallybroch and wielding his, erm, heavy dirk! In the next image, a relaxed infraspinatus underlies the elevated flesh between the yellow arrows. Here Jamie welcomes lovely Claire’s slow and sensuous kiss (Starz episode 109, The Reckoning). Although most of his back is covered with flogging scars, skin overlying infraspinatus remains largely untouched. Herself explains the extent of those scars (Outlander book):

…Even by candlelight and having seen it once before, I was appalled…The scars covered his entire back from shoulders to waist. While many had faded to little more than thin white lines, the worst formed thick silver wedges, cutting across the smooth muscles.

ep-109-infraspinatus-KLS-edited

The following image shows a contracted infraspinatus (yellow arrow) as Jamie’s upper limbs strain against his manacles. The red arrow points to deltoid (Anatomy Lesson #19) which is demarcated from infraspinatus by a skin groove. An orange arrow marks teres major, our next muscle. Here Jamie is shackled to the whipping post at Fort William and nearly beaten to death by the unholy vulture (Starz episode 6, The Garrison Commander). Herself describes it (Outlander book):

….“Well, I was tied to that post, tied like an animal, and whipped ’til my blood ran! I’ll carry the scars from it ‘til I die.”

ep-106-infraspinatus-02-KLS-edited

The next muscle moving the humerus, teres major, is not a rotator cuff muscle (Photo I). This strong and substantial muscle arises from the back of scapula just below teres minor and inserts into the front of humerus. Teres major has three functions: it adducts, extends and medially rotates the humerus.

Figure0410B teres major KLS edited

Photo I

Oops! Just lost me train of thought gawking at the next image (Starz episode 107, The Wedding)! What was the topic? Ah, I remember….. Here on their wedding night, Jamie gets the idea – aye, the lad is a quick study! He no longer crushes Claire as he contracts teres major (blue arrow) and infraspinatus (yellow arrow) to help support his weight.

ep-107-teres-major-01-KLS-edited

Teres major also helps form an important topographical landmark. In Anatomy Lesson #10, The Chest, we learned that pectoralis major forms the anterior axillary fold as it passes from chest to humerus (Photo J). Now, in anatomy, if there is an anterior there is a posterior so the posterior axillary fold contains both latissimus dorsi (Anatomy Lesson #19) and teres major muscles. The armpit or axilla (anatomical term) lies between these two folds.

Try this: If you can, abduct one arm to the vertical position. Place the opposing fist into your axilla. Now open the hand and grip the front fleshy fold; this is the anterior axillary fold formed by pectoralis major. Move your fingers backward and grip the back fold of tissue: this is the posterior axillary fold containing teres major and latissimus dorsi muscles and scapula. Good job, students!

Figure0174 teres major KSL edited

Photo J

Let’s find the above features using a Starz image. Here, Jamie’s wrists are bound and his arms elevated to about 95° of abduction (slightly above horizontal). In this position, the hollow of the axilla (turquoise arrow), anterior axillary fold (red arrow) and posterior axillary fold (black arrow) are clearly visible. Here, at Lallybroch, he receives his first beating from that ghastly and gruesome garrison commander (Starz episode 2, Castle Leoch). Herself writes (Outlander book):

They stripped off my shirt, bound me to the wagon tongue, and Randall beat me across the back with the flat of his saber. He was in a black fury, but a wee bit the worse for wear, ye might say. It stung me a bit, but he couldna keep it up for long.”

Try this: Grab a friend right inbetween the red and blue arrows and see what happens… You might want to jump back quickly once you make the grab. Just joshing! You probably dinna want to do that after all…..although I bet Rupert and Angus would be game.

ep-102-Axillary-folds-KLS-edited

Lets return to the humerus and study its distal (far) end which helps form the elbow joint (Photo K – anterior view). The shaft of the humerus flares near the elbow ending in two bony side knobs, medial epicondyle and lateral epicondyle. The tip of humerus bears two oddly shaped parts: trochlea (Latin meaning pully) and capitulum (Latin meaning small head), structures that articulate with two forearm bones.

Try this: Grip one arm about midway down with the opposite fingers and feel the hard bony shaft of humerus. Now, with elbow bent and palm turned to the sky, grip the elbow joint between thumb and index finger. Feel the bony knobs? The medial epicondyle lies nearest the body and the lateral epicondyle is away from the body. You cannot palpate trochlea or capitulum as they lie too deeply.

Figure0403A humerus KLS edited

Photo K

In Anatomy Lesson #19, we learned that the upper limb between elbow and wrist joints is the forearm and it contains two bones, radius and ulna (Photo L – anterior view of right forearm). With palm up or facing forward, the longer ulna lies medially (little finger side) and the shorter radius lies laterally (thumb side). The bluish layers represent hyaline cartilage that covers the joint surfaces. The bones are united by a tough fibrous interosseous membrane. The top of ulna bears a bony projection, the olecranon with a large trochlear notch. With the bones parallel, the forearm is in a position known as supination: palms face forward or upward.

Try this: With a bent elbow and palm facing up palpate the bone along the back of forearm; this is the ulna. Most people can only palpate the distal (far) half of the radius as it nears the wrist on the thumb side; please feel yours. Find the bony olecranon or point of the elbow.

Figure0422A supination KLS edited

Photo L

Both ulna and radius participate in the elegant elbow joint. Here, the trochlear notch of ulna grips the trochlea of humerus like a pipe wrench; together they form a hinge joint that opens with extension and closes with flexion (Photo M – flexion). The disk-like head of radius (red arrow) cups the humeral capitulum and pivots on it during supination and pronation (described below). Thus, radius, ulna and humerus together form the two-part elbow joint.

Figure0420A-elbow-joint-xray-KLS-edited

Photo M

Although the head of radius and capitulum are loosely associated, a strong annular ligament holds the radial head against the ulna (Photo N – anterior view right elbow joint): red arrow marks the trochlea and yellow arrow indicates the capitulum of humerus.

annular-ligament-KLS-edited

Photo N

Now for a wee but important Clinical Correlation: In young children, the radial head is small and loosely seated in the annular ligament (Photo O). A quick jerk of a child’s upper limb can subluxate (partially dislocate) the radial head meaning it is pulled from the grip of the annular ligament. Also known as pulled elbow or nursemaid’s elbow, radial head subluxation is the most common upper-extremity injury in infants and young children who present at an emergency room (ER). It most often occurs as an adult holds a child’s hand and jerks the arm or pulls on it to prevent a fall; understand that the jerk can be minor or even trivial. Happily, reduction of the subluxated radial head is easily performed in the ER.

subluxated radius KLS edited

Photo O

Now let’s discuss forearm movement. Returning to this earlier image (Photo P), note radius and humerus lie roughly parallel in a forearm position known as supination. Here, palms may face either upward (flexed elbow joint) or forward (extended elbow joint).

Figure0422A supination KLS edited

Photo P

With palm turned downward (flexed elbow) or backward (extended elbow) the distal (far) end of radius crosses in front of distal ulna, a forearm position known as pronation (Photo Q). Due to ligament and muscle tension, pronation is the typical resting position of forearm and hand as it is more comfortable than supination. Lastly, with elbow joint extended and palms facing the body, the forearm lies between pronation and supination.

Try this: With bent elbow, turn palm up and palpate the forearm bones: they are parallel, the thumb points away from the body and the forearm is supinated. Keeping the bent elbow slowly turn forearm so the palm faces down. Watch the distal radius move from the side to the front of ulna and come to rest so the thumb points toward the body; the forearm is now pronated. Feel the radius move as you alternately supinate and pronate the forearm. Notice that the hand is passively carried with the forearm movements. Pronation and supination are possible because the radial head spins freely on the capitulum as distal radius swings back and forth. This ingenious design adds significant mobility to the upper limb enabling us to bring our hands in front of the face for fine manipulation of the environment!

Figure0422B pronation KLS edited

Photo Q

Okey dokey, let’s find pronation and supination using dazzling images from Starz episodes. The first image is of Herself! Yes! And, this is the first time I have used Herself to teach anatomy: here in the form of fine-fabulous-fictitious Iona MacKenzie (Starz episode 104, The Gathering). Diana can now add actress to her prodigious resume!

Question: Is Iona’s left forearm pronated or supinated? Is her elbow joint flexed or extended?

ep 104 Fiona pronation KLS edited

Answer: Elbow joint is flexed. Forearm is pronated (pronation) meaning distal radius is crossed over distal ulna. You can determine this immediately even though her forearm is covered by lace and wool because the palms face down and thumb points toward the body. Ummm, Mrs. Fitz are ye are being a wee bit meow-meow towards Iona?

In the next image, Jamie is dismayed, defeated and deflated after his passionate battle of words with Claire (Starz episode 109, The Reckoning). His palms face up in an attitude of supplication. Herself describes it best (Outlander book):

…His voice cracked. “And when ye screamed, I went to you, armed wi’ nothing but an empty gun and my two hands.” … “You’re tearin’ my guts out, Claire.”

Question: Name the position of Jamie’s forearms.

ep 109 supination KLS edited

Answer: Supination (supinated) meaning ulna and radius are parallel, palms face up, and thumbs point away from the body.

Let’s challenge ourselves with more complexity in arm and forearm movements. Here a gentleman walks his hounds at the farmer’s market (Starz episode 110, By the Pricking of My Thumbs). Forearms are behind his back. Palms face backwards.

Question: Name the position of his arms. Name the position of his elbow joints. Are forearms pronated or supinated?

ep 110 walking dogs KLS edited

Answer: Arms are extended. Elbow joints are flexed. Forearms are pronated. Remember: if palms face downward or backward, the forearm is in pronation. Do you get the idea? You can assess the overall position of the upper limb by considering its component parts and determining their individual positions.

Simple Simon met a pieman. Ha! Well, this Simon is anything but simple; he is the dirty Duke of Sandringham! Have ye ever witnessed a more dramatic pie cutting? Ye would think he was preparing to stab a boar! Hmmm….wish Black Jack Randall was hiding under that crust.

Question: Name the position of the Duke’s right arm and forearm. Hint: palms face toward the body.

ep 110 cutting a pie KLS edited

Answer: His right arm is flexed. Now the forearm position is tricky. Place your own forearm in the same duke-position and judge the relationship of ulna and radius. Weel, it turns out that with the palm facing the body, the radius is between supination and pronation. Whaaat? No fair ye say? Dinna kill the messenger! The body does its own thing and we do our best to explain. Snort!

Enough of bones, let’s now examine three more muscles of the humerus and forearm: biceps brachii, brachialis and triceps brachii. Muscles of the arm are divided between two compartments: biceps and brachialis occupy an anterior compartment (in front of humerus) and triceps brachii occupies a posterior compartment (behind the humerus). Another image of Jamie at the Lallybroch beating (Starz episode 102, Castle Leoch) clearly shows the pronounced groove between the arm compartments: biceps and brachialis muscles lay above the red arrow and triceps lies below. Appreciate how beautifully muscles of chest, shoulder, arm and forearm interweave to produce the bonny ebb and flow of body contour; each muscle plays its part in this anatomical ballet.

ep-102-biceps-triceps-KLS-edited

Now for the muscles: biceps brachii (Latin meaning two-headed muscle of the arm) has a long head and a short head both of which take origin from the scapula and cross the glenohumeral joint. The two heads fuse into a single muscle belly that splits into two tendons that cross the elbow joint: a flat tendon joins the superficial forearm fascia (bicipital aponeurosis) and a sturdy tendon inserts near the head of radius (Photo R – anterior view). Because biceps brachii crosses two joints, it acts on both: it aids arm flexion but its major action is on the forearm where it supinates and then flexes the supinated forearm. Think about opening a bottle with a corkscrew: first the biceps unscrews the cork (supination) and then it pulls out the cork (flexion).

Try this: With bent elbow, grip your biceps and supinate the forearm (palm up). Now, alternately flex and extend the elbow joint. Feel the biceps contract and relax with this movement? Now pronate the forearm (palm down) and repeat; the biceps is mostly flaccid because it activates with the forearm in supination.

Figure0414A biceps brachii KLS edited

Photo R

Jamie provides a splendid example of his right biceps brachii as he is manacled to the flogging post at Fort William (Starz episode 106, The Garrison Commander)! BRJ circles like the depraved jackal he is. Most of the bulge seen at the red arrow is created by biceps brachii although some is due to the deeper lying brachialis muscle. Read on, please.

ep-106-biceps-02-KLS-edited

A short cautionary tale: A couple of years ago, a lady at my gym avulsed (detached) the short head of biceps from its scapular origin giving the muscle a “Popeye” appearance. The cause: she was lifting weights that exceeded her biceps strength. Unfortunately, she delayed seeking medical care for a few months by which time the biceps had scarred and the tendon was no longer eligible for surgical reattachment. If you suspect a tendon tear, prompt assessment and treatment promotes optimal outcome! A better weight-lifting strategy is to reduce weight load but increase number of repetitions.

The next muscle is brachialis; it lies deep to biceps brachii (Photo S – anterior view). Brachialis arises from humerus and inserts on ulna. Although overlaid by biceps, brachialis is actually the workhorse of the elbow joint because it flexes the joint regardless of forearm position.

Try this: With a bent elbow, return forearm to pronation, grasp the biceps region, now flex the elbow joint. The deep contraction you feel is brachialis.

Figure0414B brachialis KLS edited

Photo S

I can’t demonstrate brachialis with Starz images because it lies too deeply so let’s move on to the last muscle of this lesson, triceps brachii. As the name implies, triceps has three heads: a long head arises from scapula, a lateral head arises from upper humerus and a medial head arises from lower humerus (Photo T – posterior view). The heads unite as one muscle mass that turns into a stout tendon above the elbow joint and then inserts into the olecranon of ulna. The long head helps adduct and extend the shoulder joint but together all three heads extend the elbow joint especially against resistance such as with push-ups.

Try this: Grip your triceps in back of the humerus and alternately flex and strongly extend the elbow joint. Feel the triceps contract with extension and relax with flexion?

Figure0415A triceps brachii KLS edited

Photo T

The triceps brachii are clearly visible in well-muscled individuals such as JAMMF. Here the long head of triceps is marked by the yellow arrow and the red arrow points to the lateral head of triceps (Starz episode 107, The Wedding). The medial head cannot be identified because it lies deeply. Claire, the expression on your face … wowzers!

ep-107-triceps-brachii-KLS-edited

How about we entertain a short pop quiz using images from the latest Starz episodes? To set the mood, let’s consider the beautiful murmuration of starlings at the outset of Starz episode 111, The Devil’s Mark. If you have yet to see a significant murmuration, take a few and watch this one set to Johann Pachelbel’s Canon. Here, the murmuration dips, sways and undulates like a single living organism.

In the thieves’ hole, Claire recalls seeing starling murmurations as a child visiting Brighton. She explains that starlings perform their aerial ballet because there is safety in numbers from predators. Intentional or not, I swear I saw a murmuration of the mob at the trial and it is bloody brilliant! Watch again and see the crowd shout and surge forward each time Claire is skelped with the whip! Between blows, they fall back moving as a single organism. Safety in numbers to be sure, but this time the mob is predator and two accused are victims. Riveting and fascinating. Props to the extras and Claire!!!

ep 111 murmuring crowd KLS edited

Now for the pop quiz:

The first image is of that lousy, long-haired lass Laoghaire looking verra guilty, as she should (Starz episode 110, By the Pricking of my Thumbs)! Weel, she tried her best to seduce Jamie and left a nasty ill wish under Claire’s bed. If she had a firearm right now, she would likely fire it at Claire! Puir Mrs. Fitz, she hasna a clue about her cunning, manipulative “darling granddaughter.”

Question: What is the position of Laoghaire’s arms? What is the position of her elbow joints?

ep 110 abduction KLS edited

Answer: Both arms are abducted to 45°. If you answered just abduction, that is fine. But, feel free to modify an answer for further accuracy. Both elbow joints are flexed.

Here’s kindly Mrs. F. anointing motherly Mrs. F. with salve. Och, those deadly ovens at Castle Leoch have burned her yet again (Starz episode 110, By the Pricking of my Thumbs)! But, as per Letitia, she bakes yummy bannocks!

Question: Name the position of Mrs. Fitz’s right forearm.

ep 110 pronation (2) KLS edited

Answer: Right arm is pronated (palm faces downward).

Our fabulous hero barely has time to draw his dirk after a sneak attack by Alexander MacDonald (Starz, episode 110, By the Pricking of my Thumbs)! Fear not, his retaliatory move is breath-taking! Like Joshua or David of the Old Testament, Jamie drops to his knee and fells his opponent with a single blow to the right hamstring. Take my word for it, Alex willna be walking well after that. Hummmm, cowardly Duke cowers behind the tree.

Question: Name the positions of Jamie’s right arm, elbow joint and forearm.

ep 110 arms 01 KLS edited

Answer: His right arm is flexed, elbow joint is extended and forearm is pronated (palm down). By golly, this is fun!

Jamie didn’t emerge Scot free (haha) from that “common brawl” – his own blood was spilled (Starz, episode 110, By the Pricking of my Thumbs)… “You’re not normally a closed-mouth woman, Claire. I expected noisier displeasure!” Claire’s lips are sealed as she stitches Jamie’s wound. He attempts to sooth her with “’Tis but one more scar, Sassenach. Nothing to brood over.” You wanna bet? Ouch! Her stitching of that gaping wound sans anesthesia isna tender. She is royally pissed! He kens he’s getting the silent treatment; that needle speaks more eloquently than a thousand words! Stalwart Jamie sits with shoulders back and weight supported by his hands.

Question: Name the position of Jamie’s elbow joints and arms (this question harkens back to the arm movement review at the start of this lesson).

ep 110 lateral rotation 1 KLS edited

Answer: Lateral rotation of arm. Elbow joints are extended.

Here’s our Highland hero with both sword and dirk drawn (Starz episode 111, The Devil’s Mark). He barreled down the steps scattering men like pins in a bowling alley! His intent is clear “first man forward will be the first man down.” Lads, odds may be five or six against one but Jamie means it! Back off! Outlander book sets the stage verra well:

“I draw it in defense of this woman, and the truth,” he said … Jamie looked the judges over coolly…”I swore an oath before the altar of God to protect this woman. And if you’re tellin’ me that ye consider your own authority to be greater than that of the Almighty, then I must inform ye that I’m no of that opinion, myself.”

Question: Name the position of Jamie’s arms, elbow joints and forearms:

ep 111 abduction KLS edited

Answer: Arms are abducted to 90 ° (a.k.a. horizontal abduction), elbows are extended, forearms are between pronation and supination (palms face toward the body if arms are lowered).

Students, you did very well on the pop quiz. Thanks for playing along!

Now, let’s end this lesson with a bit of history. Human anatomy (Greek meaning to cut away) is considered the oldest medical science. Millennia passed before western culture permitted and embraced dissection of the human body thus keeping in place centuries of inaccurate concepts and teachings. More pertinent to today’s topic, accurate anatomical drawings of the upper limb have been available for not quite 500 years. Some of the earliest and most elegant anatomical drawings were done by Renaissance genius, Leonardo Da Vinci (1452-1519). Although not the first to draw the upper limb, he broke ground because his images included comparative anatomy between species as well as drawings of the living and the dead. Although his paintings were widely known during his lifetime, only a few associates were aware of his anatomical research. He never worked as a professional anatomist, he never taught the subject and unfortunately, he never published his anatomical observations which would have greatly advanced the science of anatomy. Photo U shows his wonderful progressive drawings of shoulder, arm and forearm musculature. Although not quite anatomically correct, they are very close. This image is a replica of one of 600 Da Vinci drawings housed in The Royal Library at Windsor Castle, one of the finest private collections in the world. BTW, upper right image is a rendering of hard and soft palates and tongue. Not sure why it appears on the same page as the upper limb; mayhap to save paper?

Leonardo DaVinci KLS edited

Photo U

Hope you enjoyed the lesson on the arm and forearm. Knowledge is power: forearmed is forewarned!

A deeply grateful,

Outlander Anatomist

Photo creds: Starz, Netter’s Atlas of Human Anatomy, 4th ed., Clinically Oriented Anatomy, 5th ed., Human Anatomy, Martini and Tiimmons, 1st ed., Gray’s Anatomy for Students, 1st edition, www.baycarehealth.adam.comwww.eorthopod.comwww.methodistorthopedics.comwww.stephanierose156.blogspot.comwww.Wikipedia.com